
Bathroom Remodel - New Shower
In order to better understand building construction I believe that experience in the field is vital to improving knowledge and implementation of good architecture. There can be a disconnect between sitting behind a computer all day drafting details and that of being in the field understanding order of operations, and construction means and methods. Understanding how paper design becomes built architecture is an important endeavor all architects should pursue. In this case, I took on a full bathroom remodel starting with the shower/tub demo and install, because believe it or not, I don’t mind getting down and dirty in the throes of building construction.
Admittedly, this was my first house remodel project that I’d be tackling for the majority of the work on my own. I had the help of my brother for some of the first steps, and to walk me through other tasks that posed a challenge. It felt a bit like learning to ride a bike with training wheels before having them ripped off mid inaugural flight. I would reference multiple books, watch Youtube videos, and search the internet when I had questions or to make sure I was doing something right. It was the same vein of “measure twice, cut once” only this time more like, “research multiple outlets, triangulate the best method, and still wonder why everyone does it differently” methodology. Eventually, “learn thrice, measure twice, and cut once” became my go-to mantra for staying on track and doing the work correctly (not always perfectly).
When I first started the work, the demo was fast, loud, and showed great signs of progress. It isn’t until you get down to the nuts and bolts of the project do things slow down - in this case the pipes. The existing house is plumbed with galvanized pipes that have been rusting, and by the evidence of stained/damaged wood, leaking for years. This posed a greater problem, one that I would kick down the road when the time comes to replace all the galvanized pipes in the house. For now, I had to keep my scope focused on the task at hand and connect to the galvanized pipes before transitioning to PEX tubing. This was probably the most difficult part of the project, disconnecting existing piping; a process that involved lots of sweat, muscles, and a few expletives here and there for good measure.
One other expectation versus reality you might overlook is the amount of tools required - and good tools at that. There is literally a tool for every task you might encounter, but that doesn’t always mean you need to buy a new tool. This is where experience from the field comes in handy of knowing a workaround, or having a multifunctional tool that does more than one job. In my case, back to the research to find an alternative method, or convincing myself not to make another trip to the hardware store until I’ve exhausted all possibilities. Quantity of tools and the shear number of times you’ll find yourself at the hardware store were all a surprise to me.
Having completed the bathroom shower demolition and remodel, I can say definitively that I’m hooked and will be continuing with the rest of the bathroom remodel myself. There’s nothing like seeing your work and knowing the amount of labor (sweat - lots of sweat) and equipment that went into the project. Not to mention all the hidden elements that no one will notice like new PEX supply tubing for the shower components. Enjoy the snippets of photos below that I took of the process, and be sure to scroll to the bottom to see the end result!
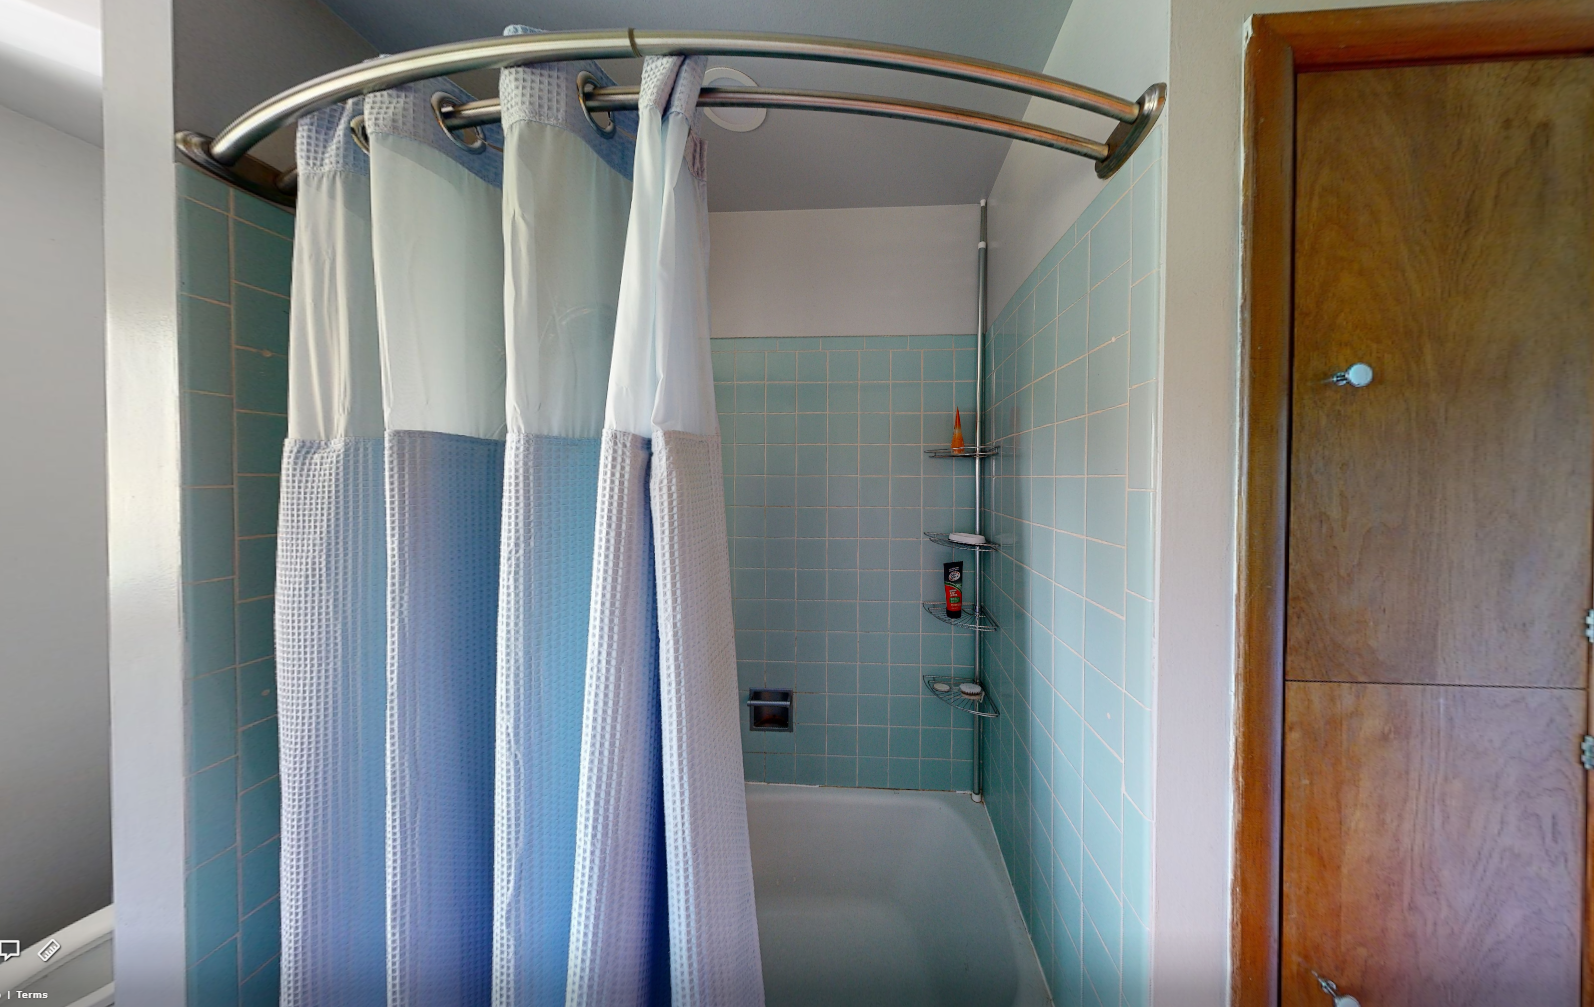
EXISTING SHOWER -
BEFORE DEMOLITION
The existing shower was old, rusted, and had missing tiles and escutcheon plates for the shower controls. This shower needed a complete makeover including new supply and drain pipes before I even considered showering here.
DEMO DAY BEGINS!
But first, before any demolition work be sure to consult with local building departments and obtain any necessary permits, etc. Also, be sure to do any material testing such as asbestos for all materials to be demolished for proper disposal. In this case, we tested the tile and gypsum wall board.
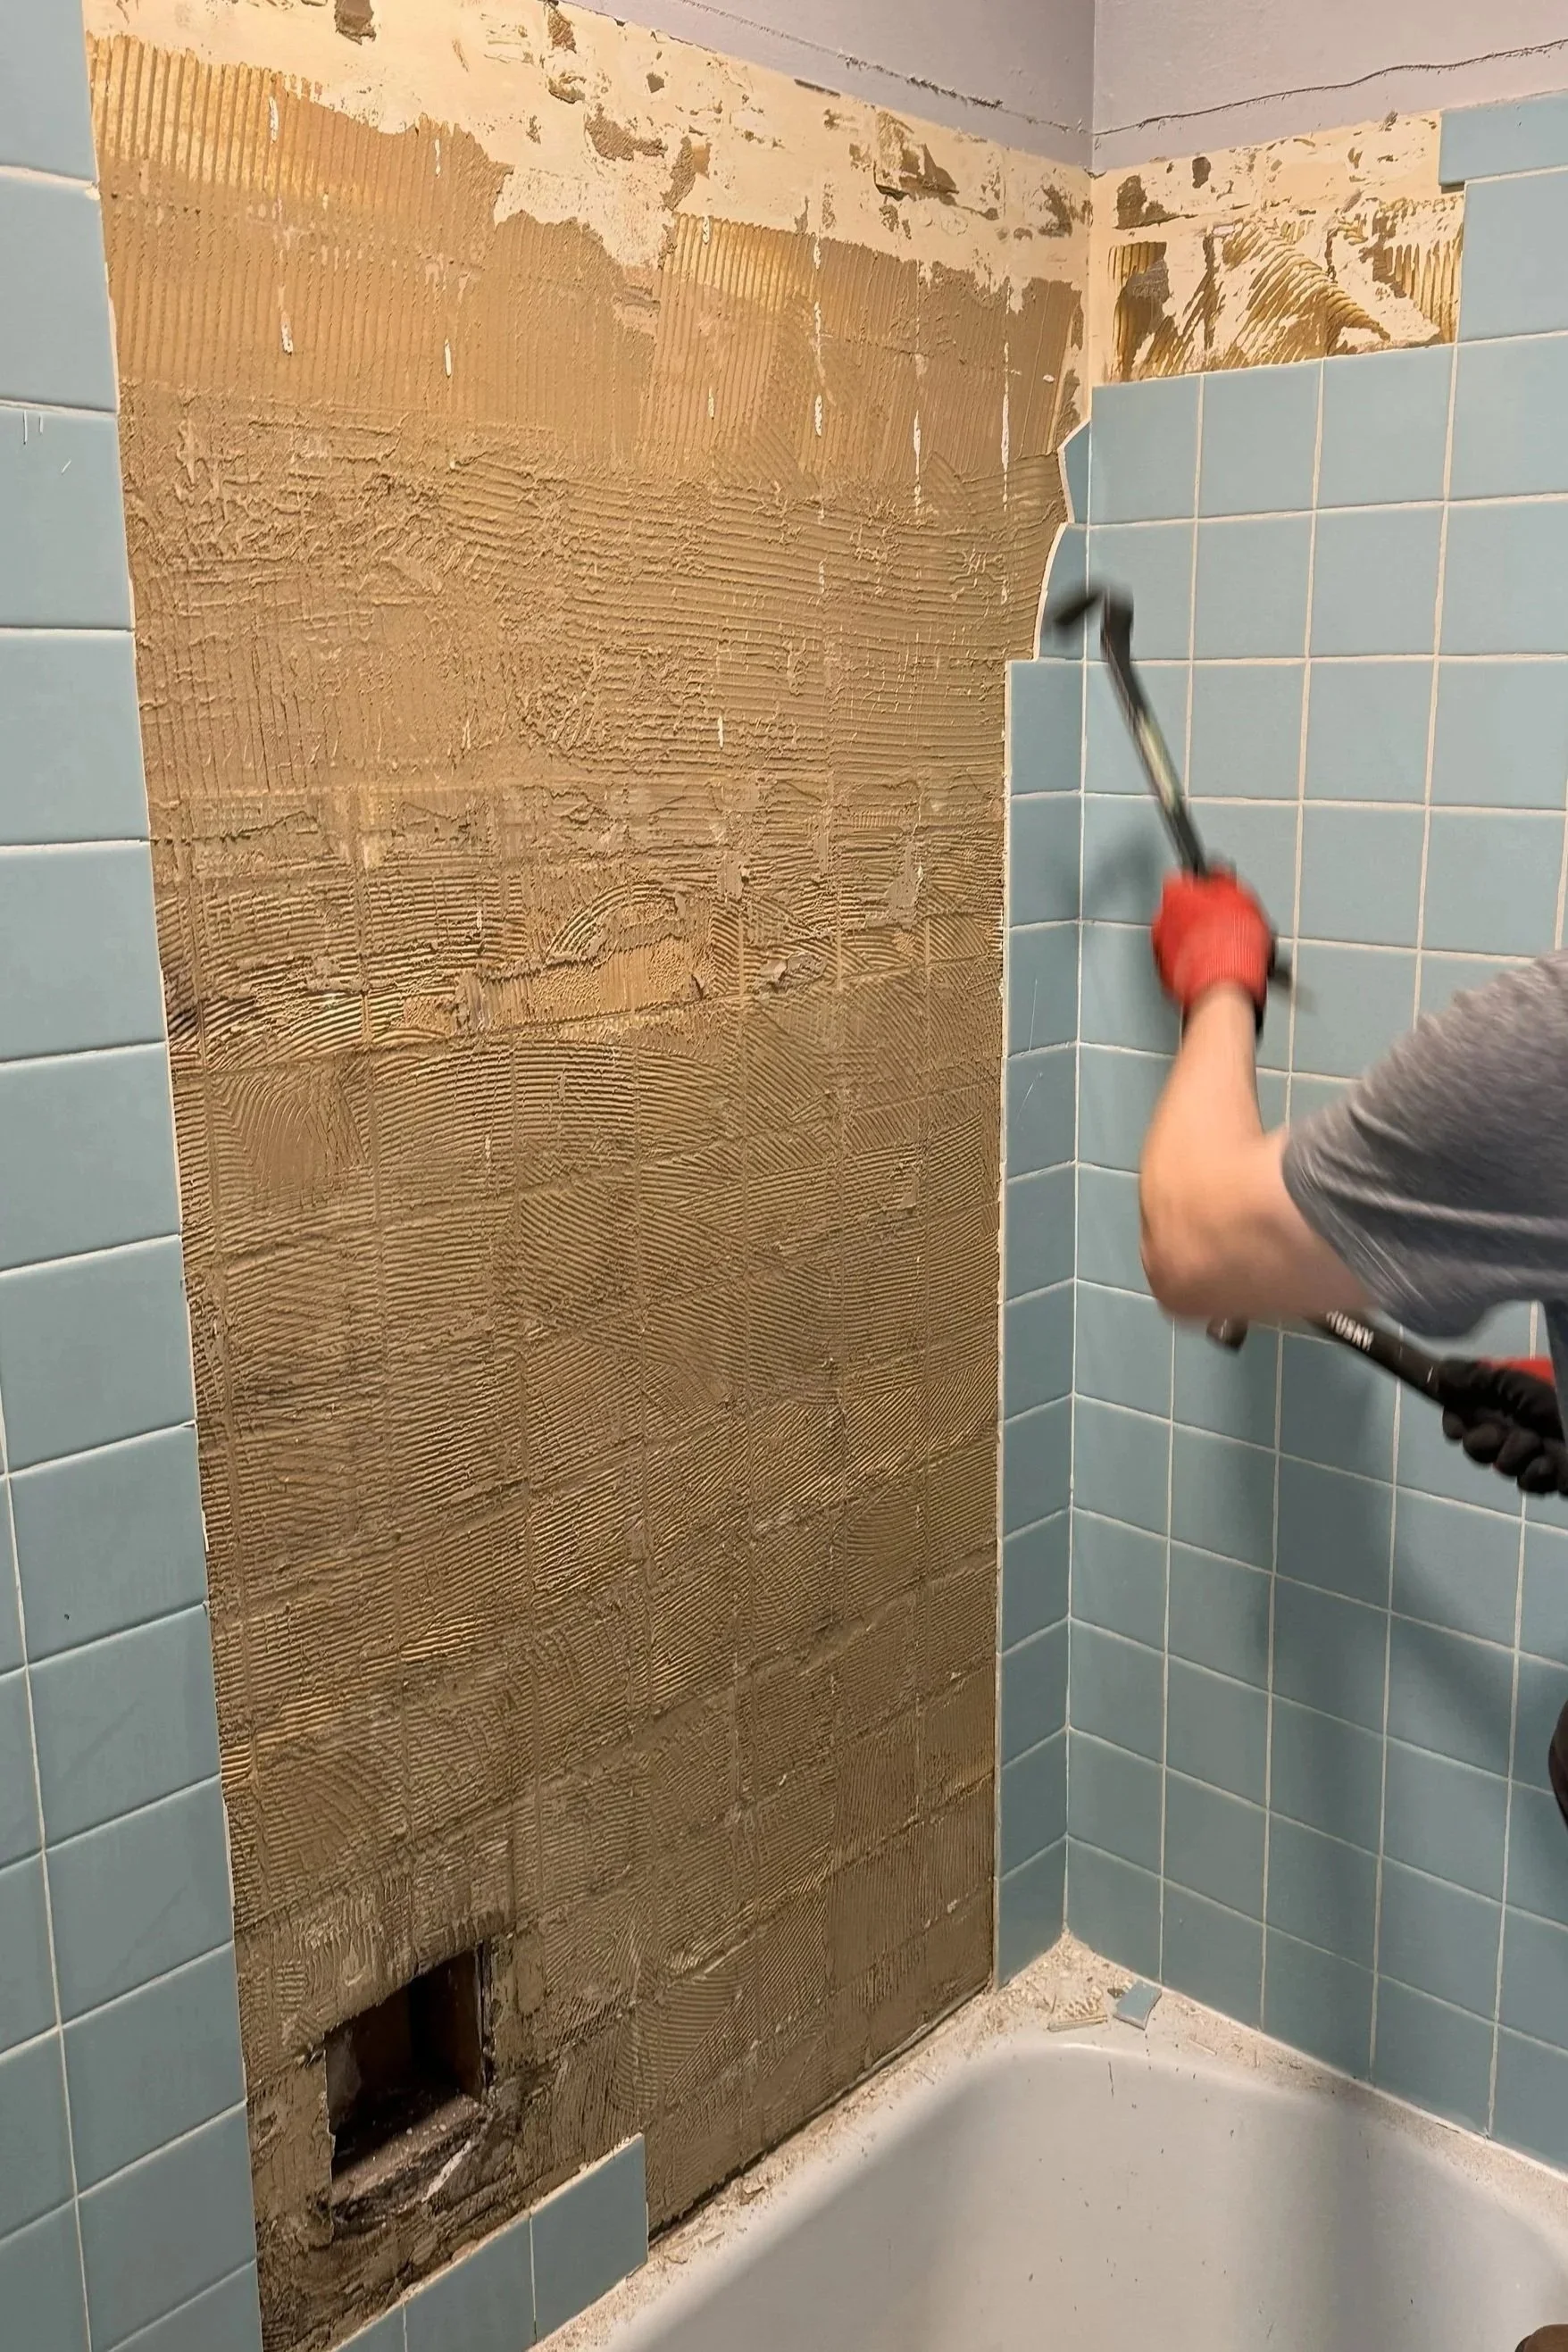
DEMO OF GYPSUM WALLBOARD
Once the tile was removed, we continued with demolition by removing the gypsum wallboard. In many parts, the gypsum board had crumbled from years of exposure to water. Most likely, this gypsum was not rated for shower enclosures and had failed from cracks and leaks in the tile.

ANYONE NEED A SOLID STEEL TUB??
I did not anticipate having to remove a solid steel tub that is 3/4” thick and weighs way too much for what it is. We had to hoist the tub onto a dolly in order to move it out of the way.
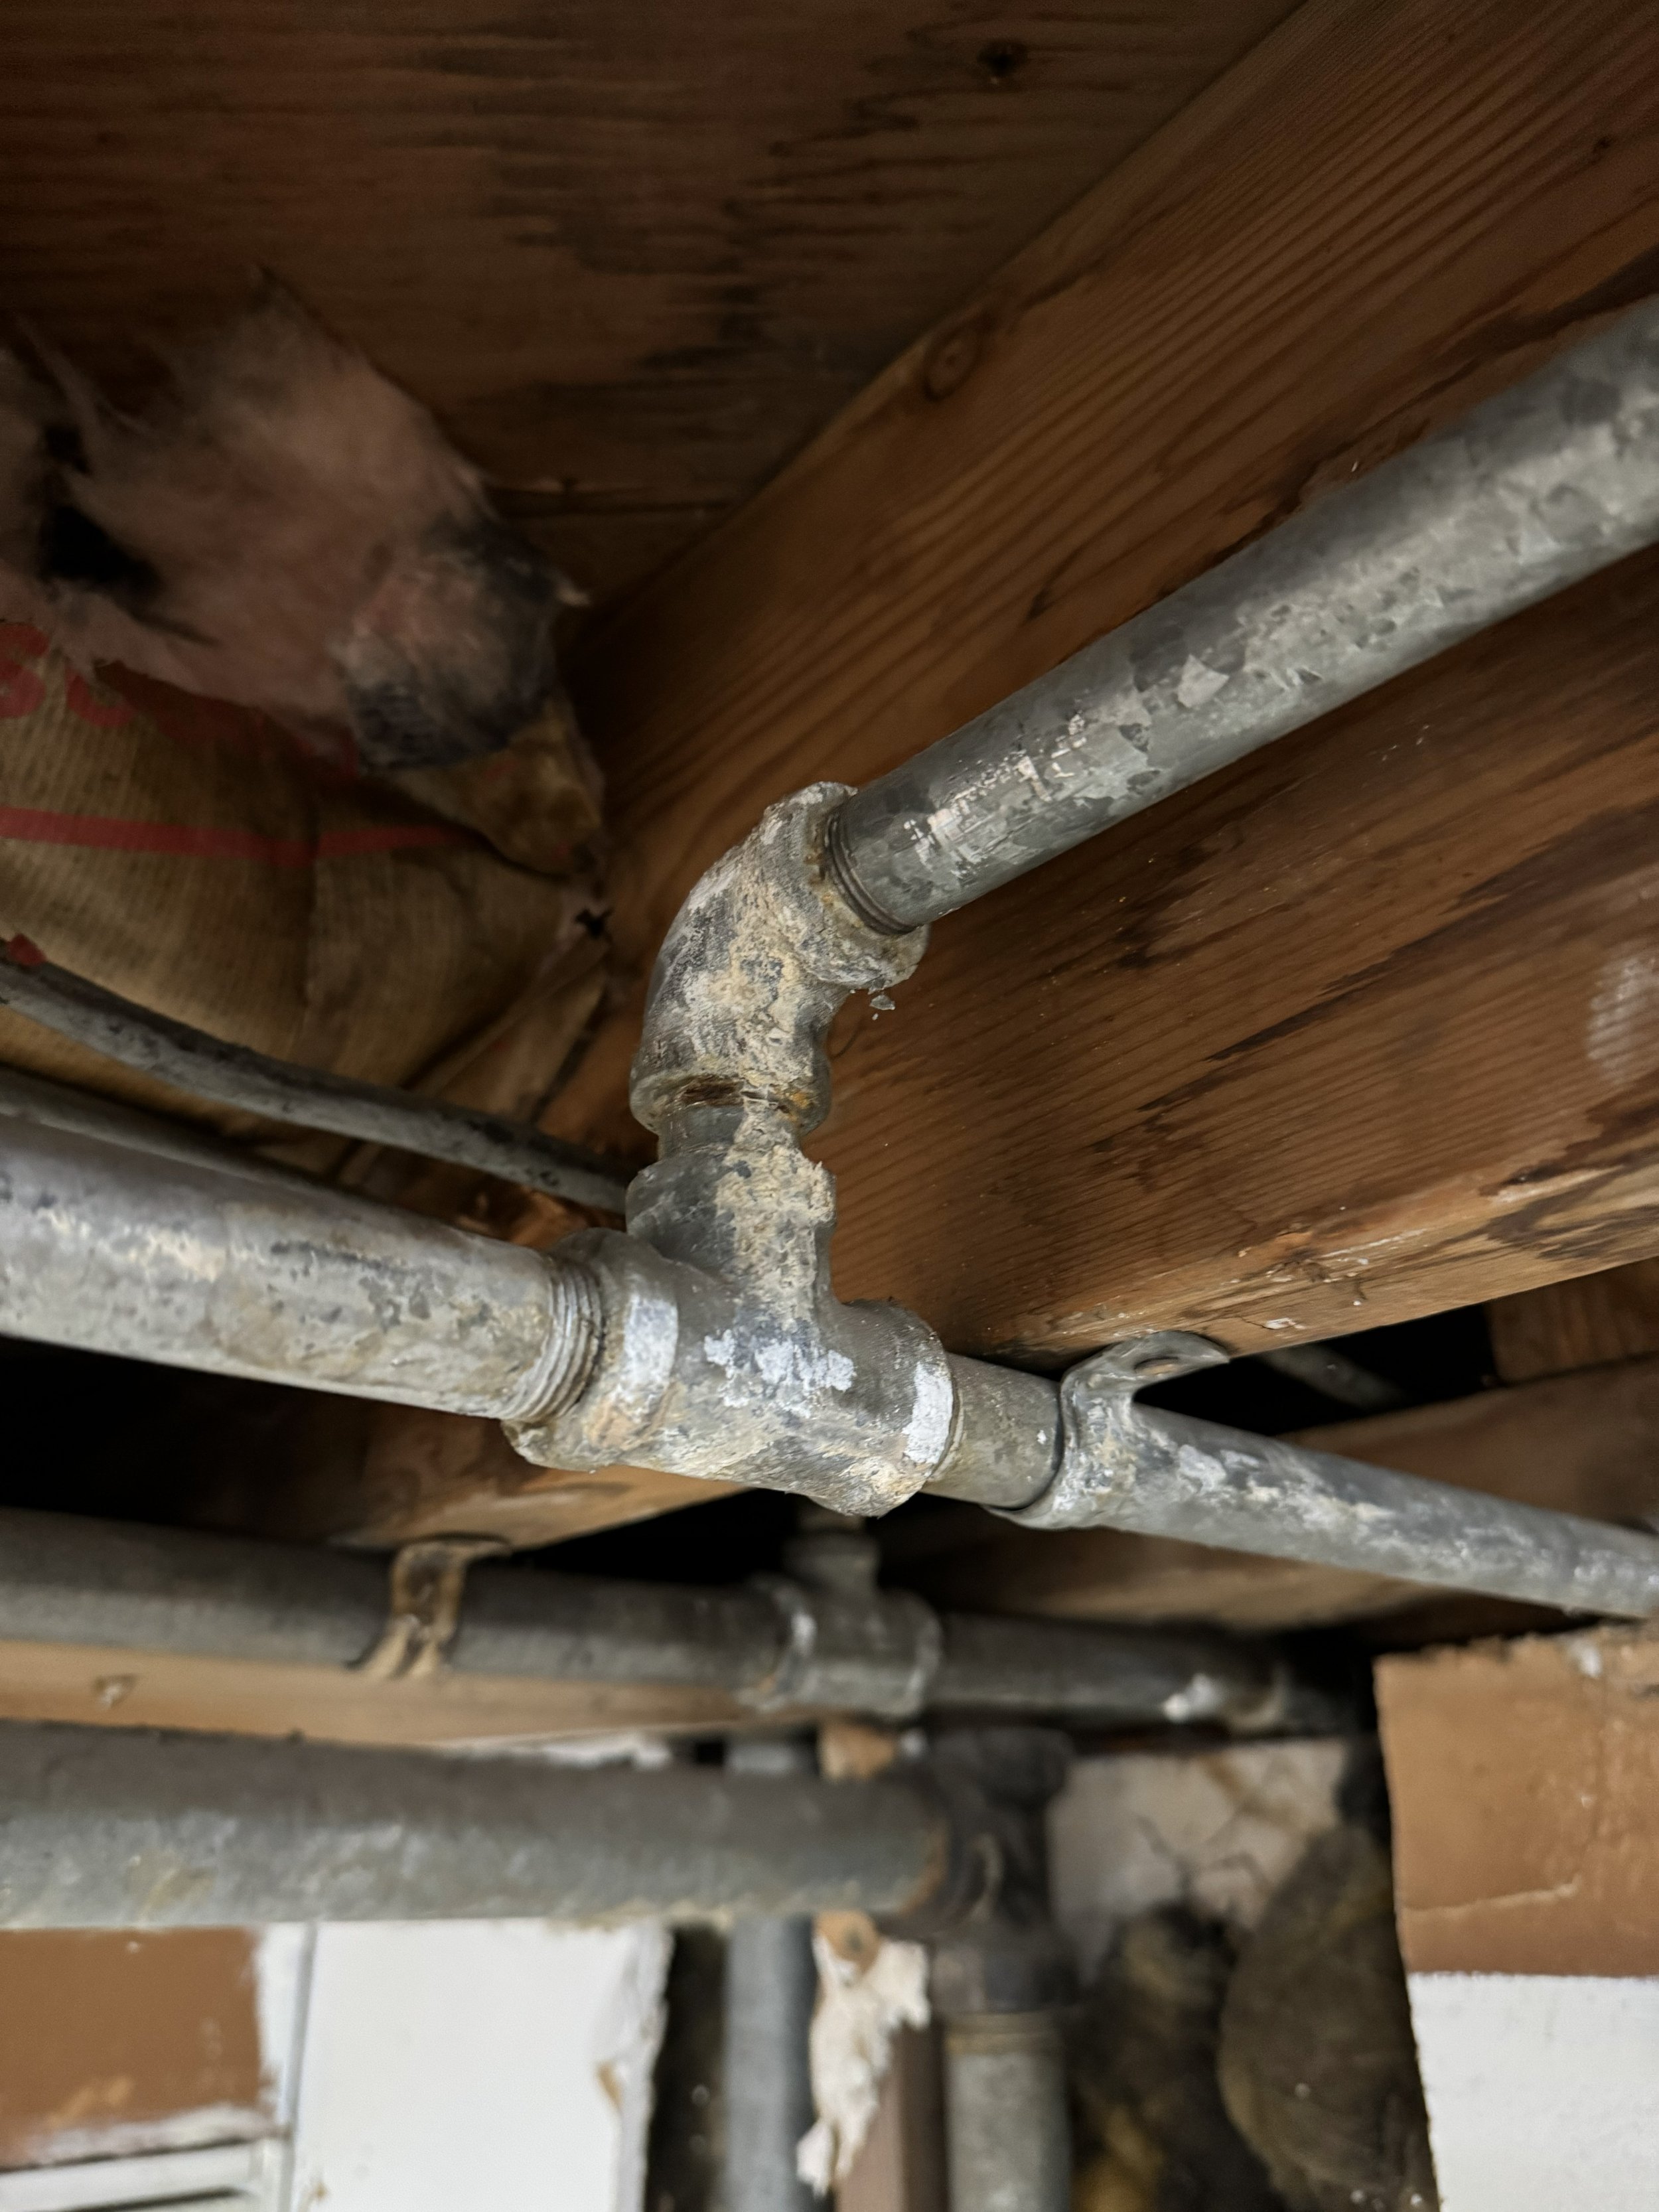
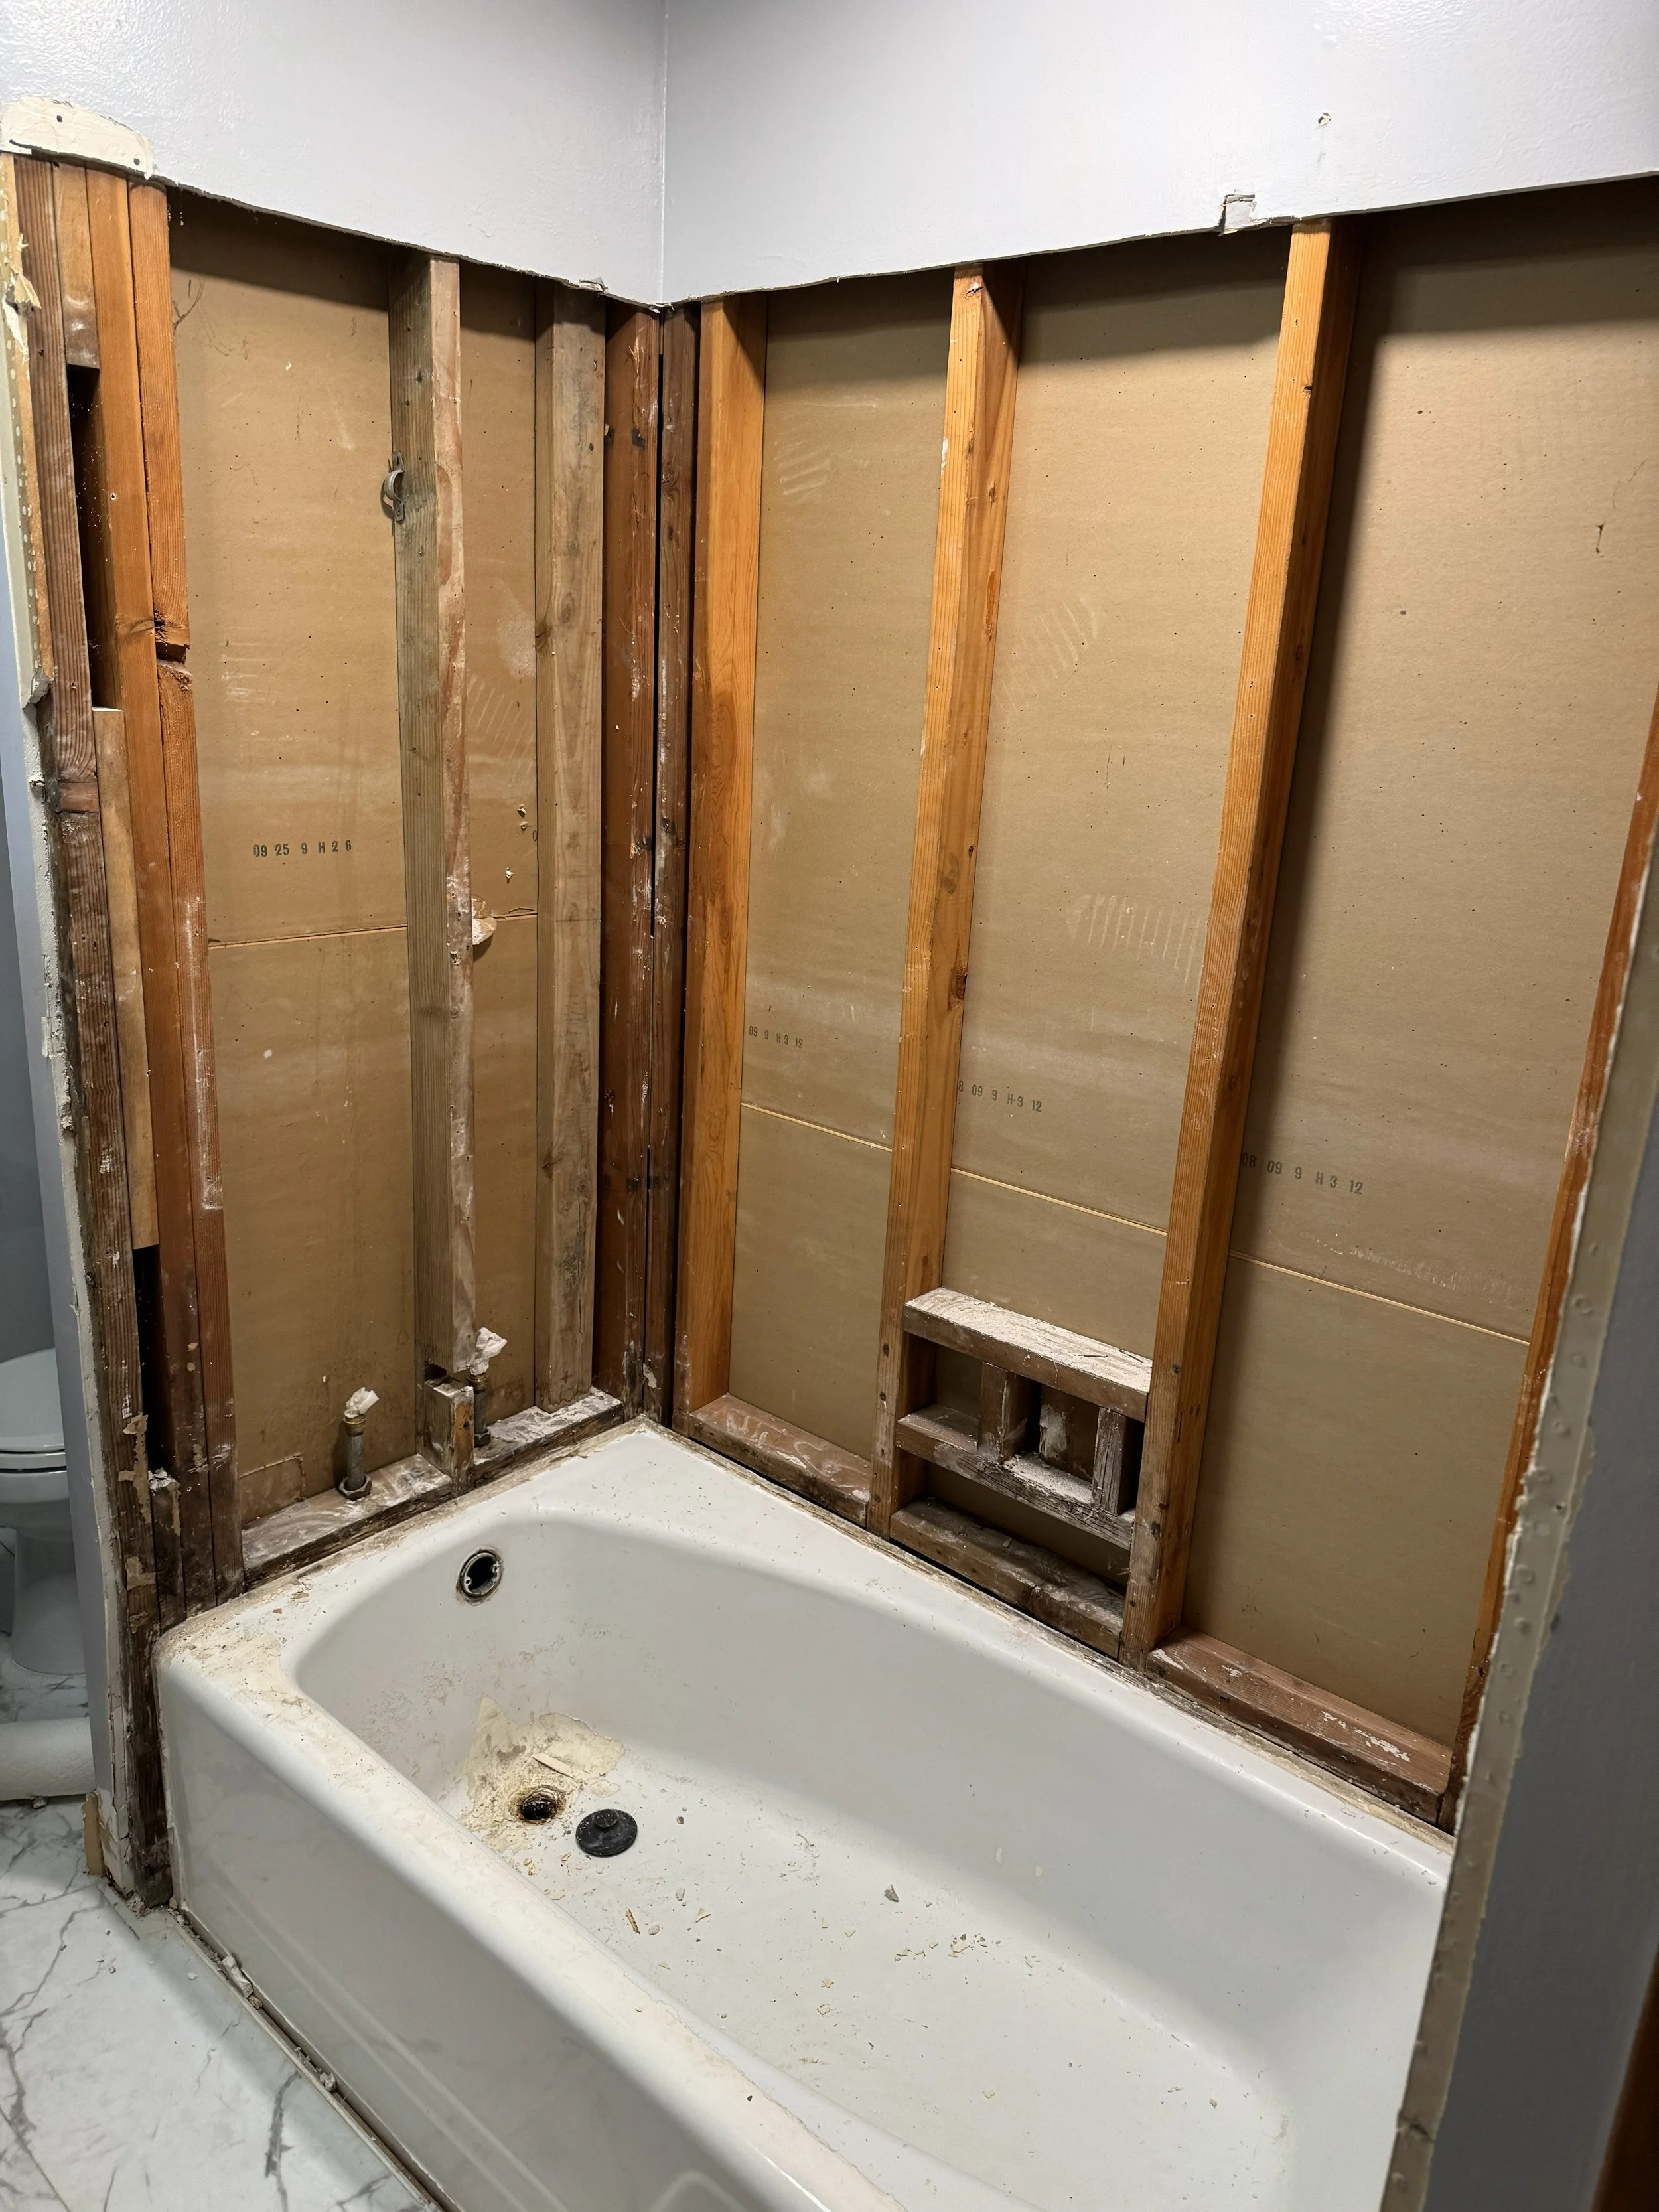
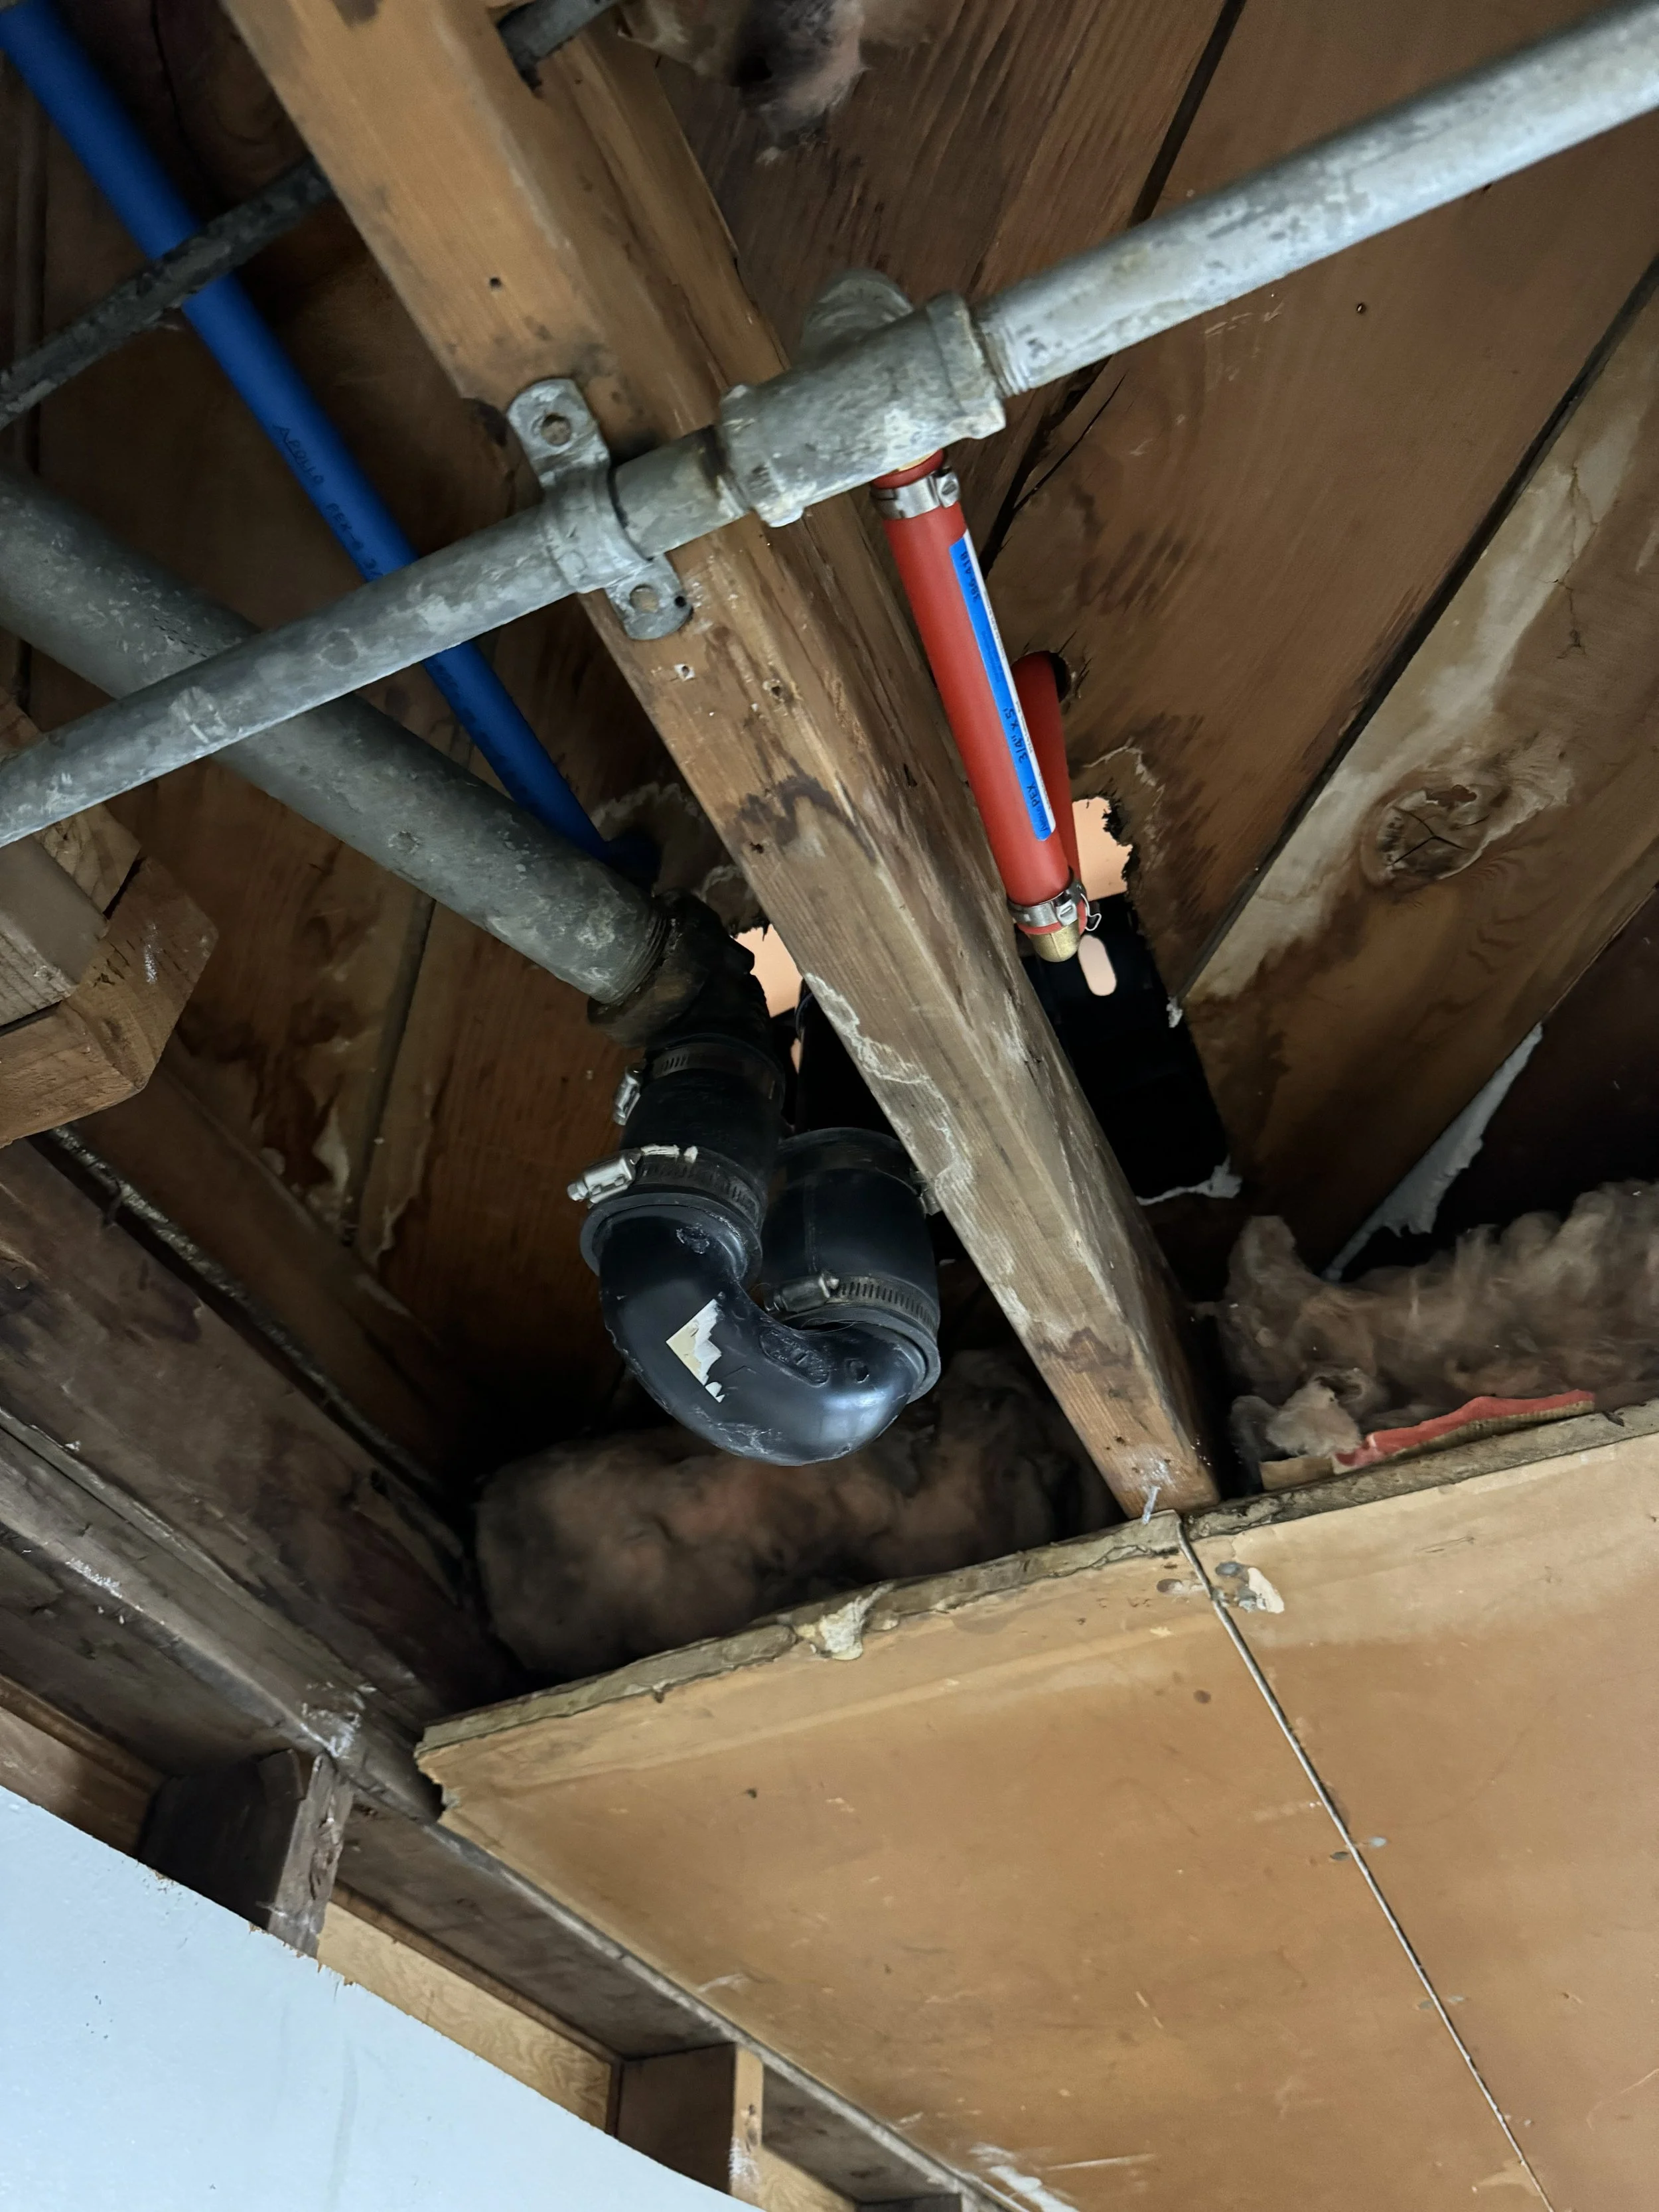
THE GALVANIZED MENACE
This was the hardest part of the project, tapping into the hot and cold water existing galvanized pipes. We had a plumbers wrench, and easy access to the pipes from the underside, but they would not budge. With some careful heating of the pipes we finally made progress.
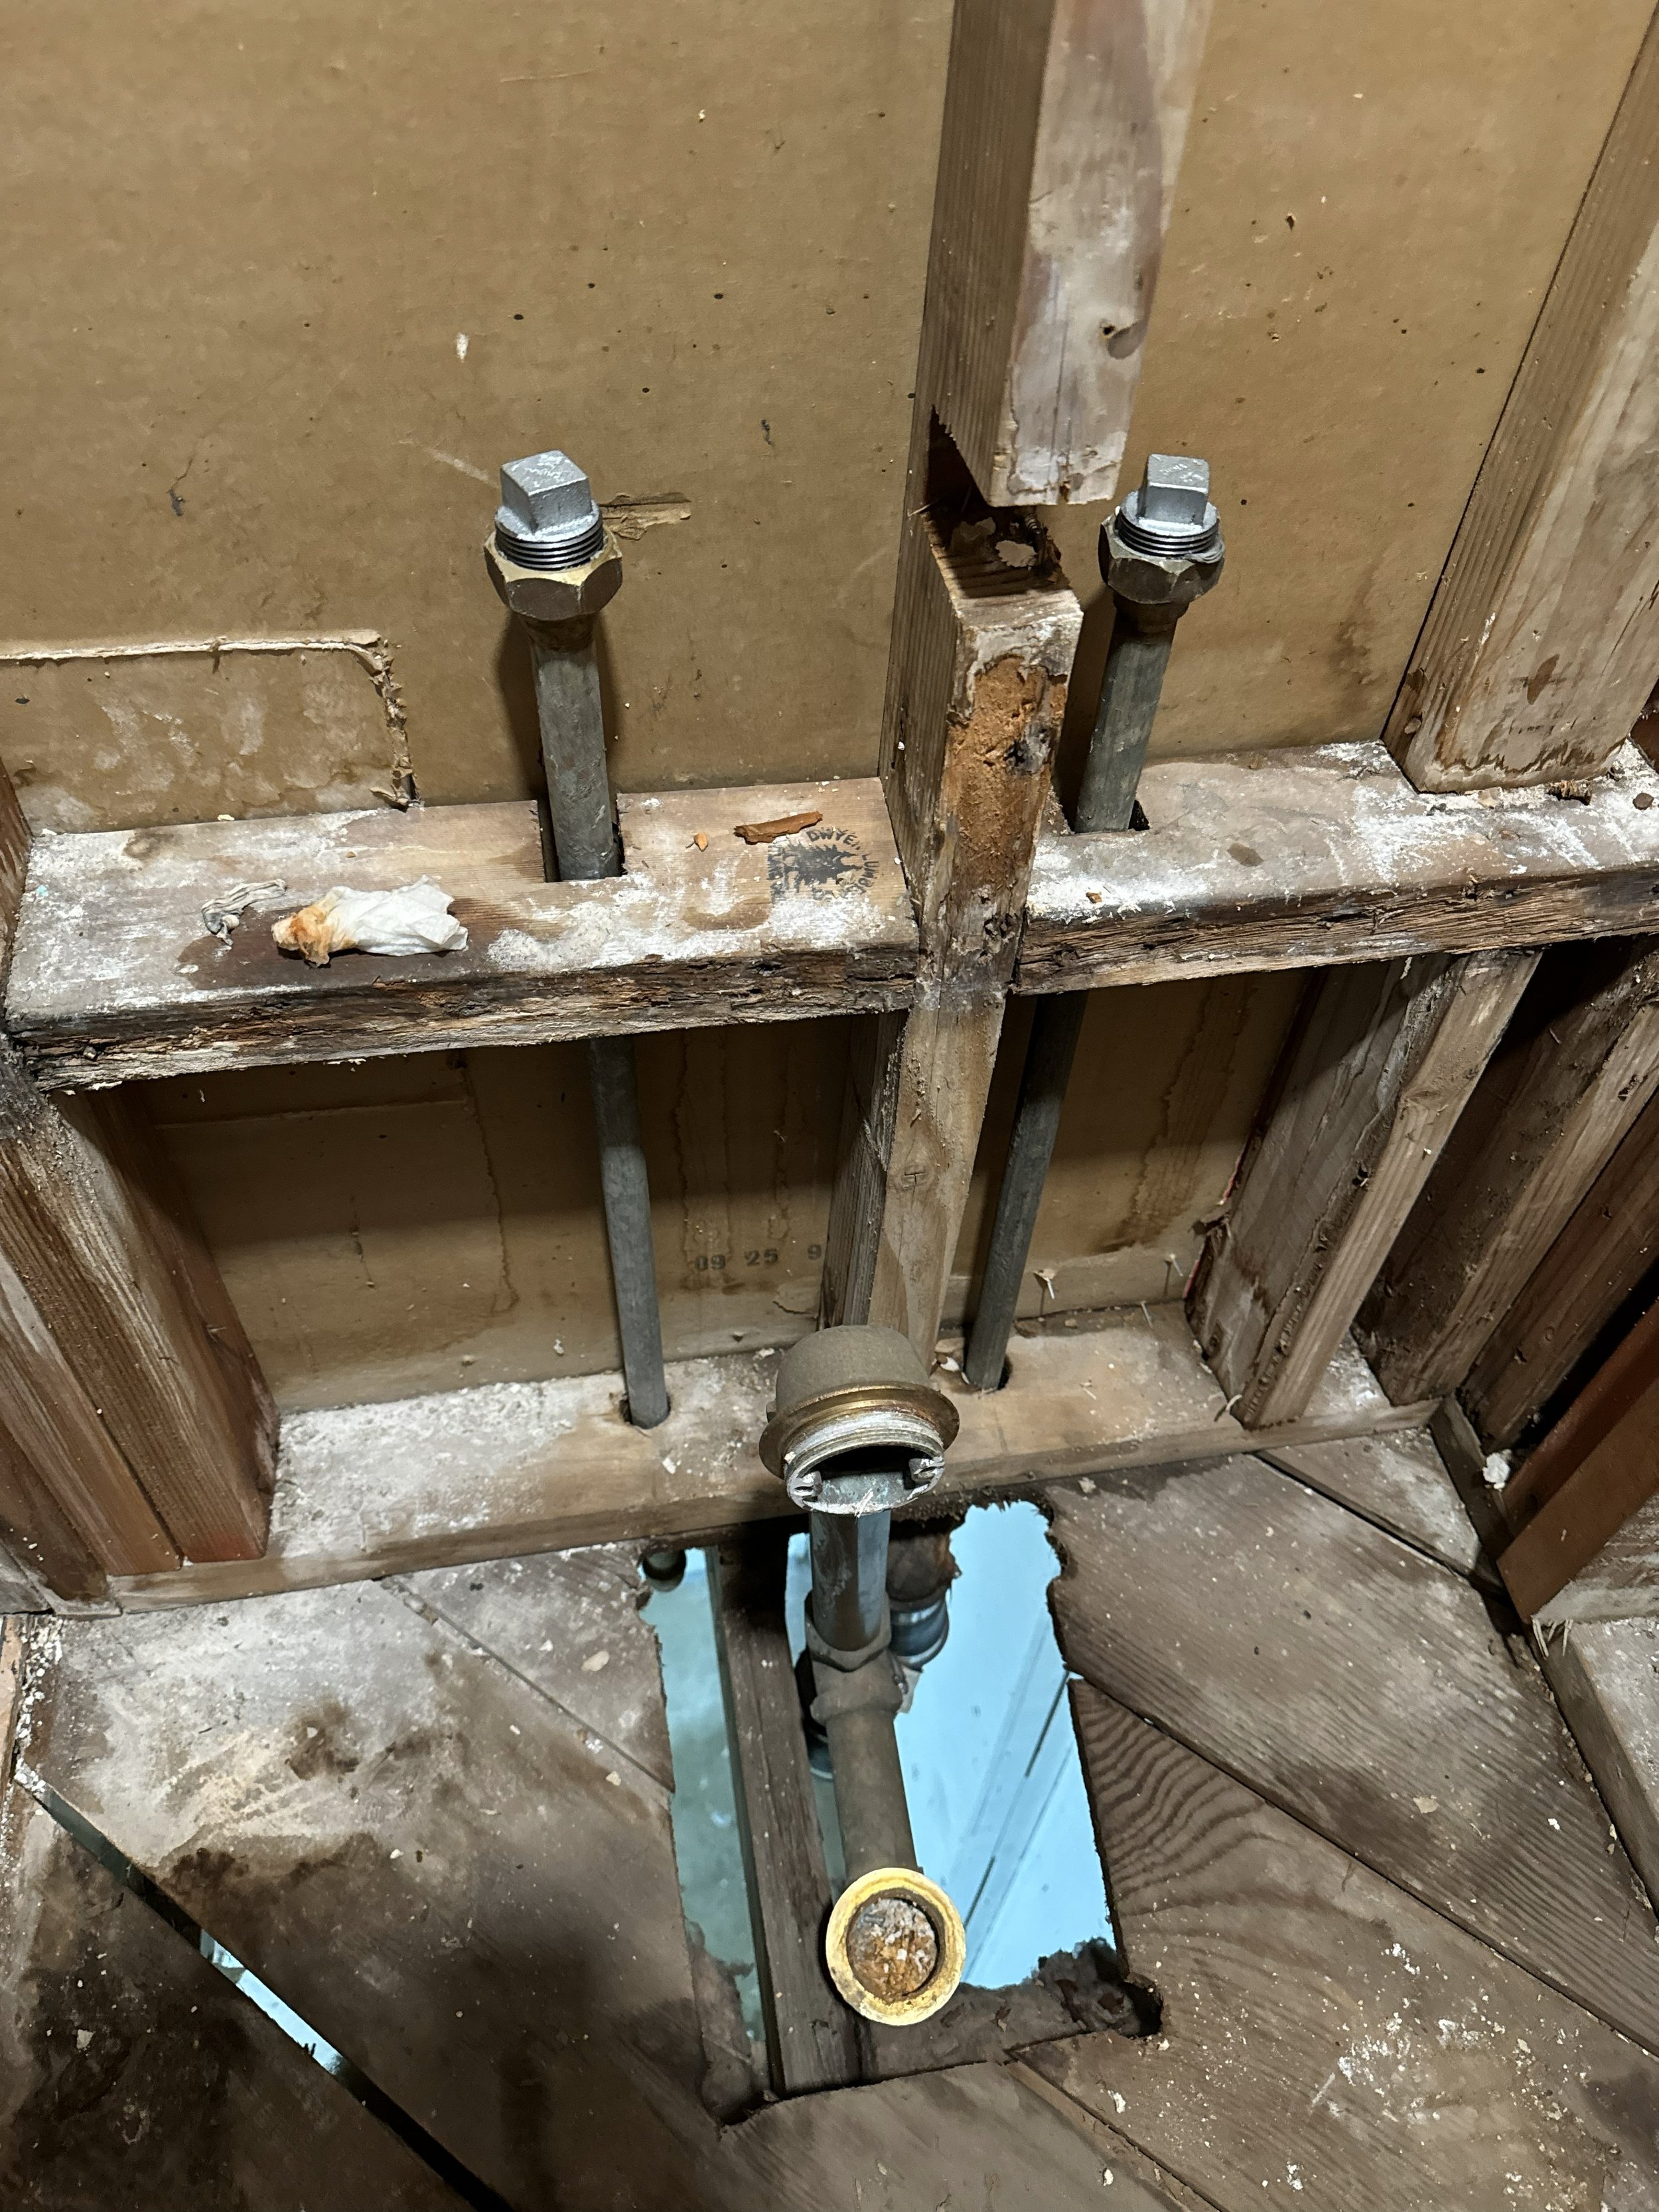
EXISTING HOT AND COLD SUPPLY
Before I could tackle the PEX installation, I had to plug the lines until I was ready to begin. For some reason I had trouble finding the correct size and made multiple trips to the hardware store before finally landing the correct size. I was glad to finally turn the water back on without any leaks.
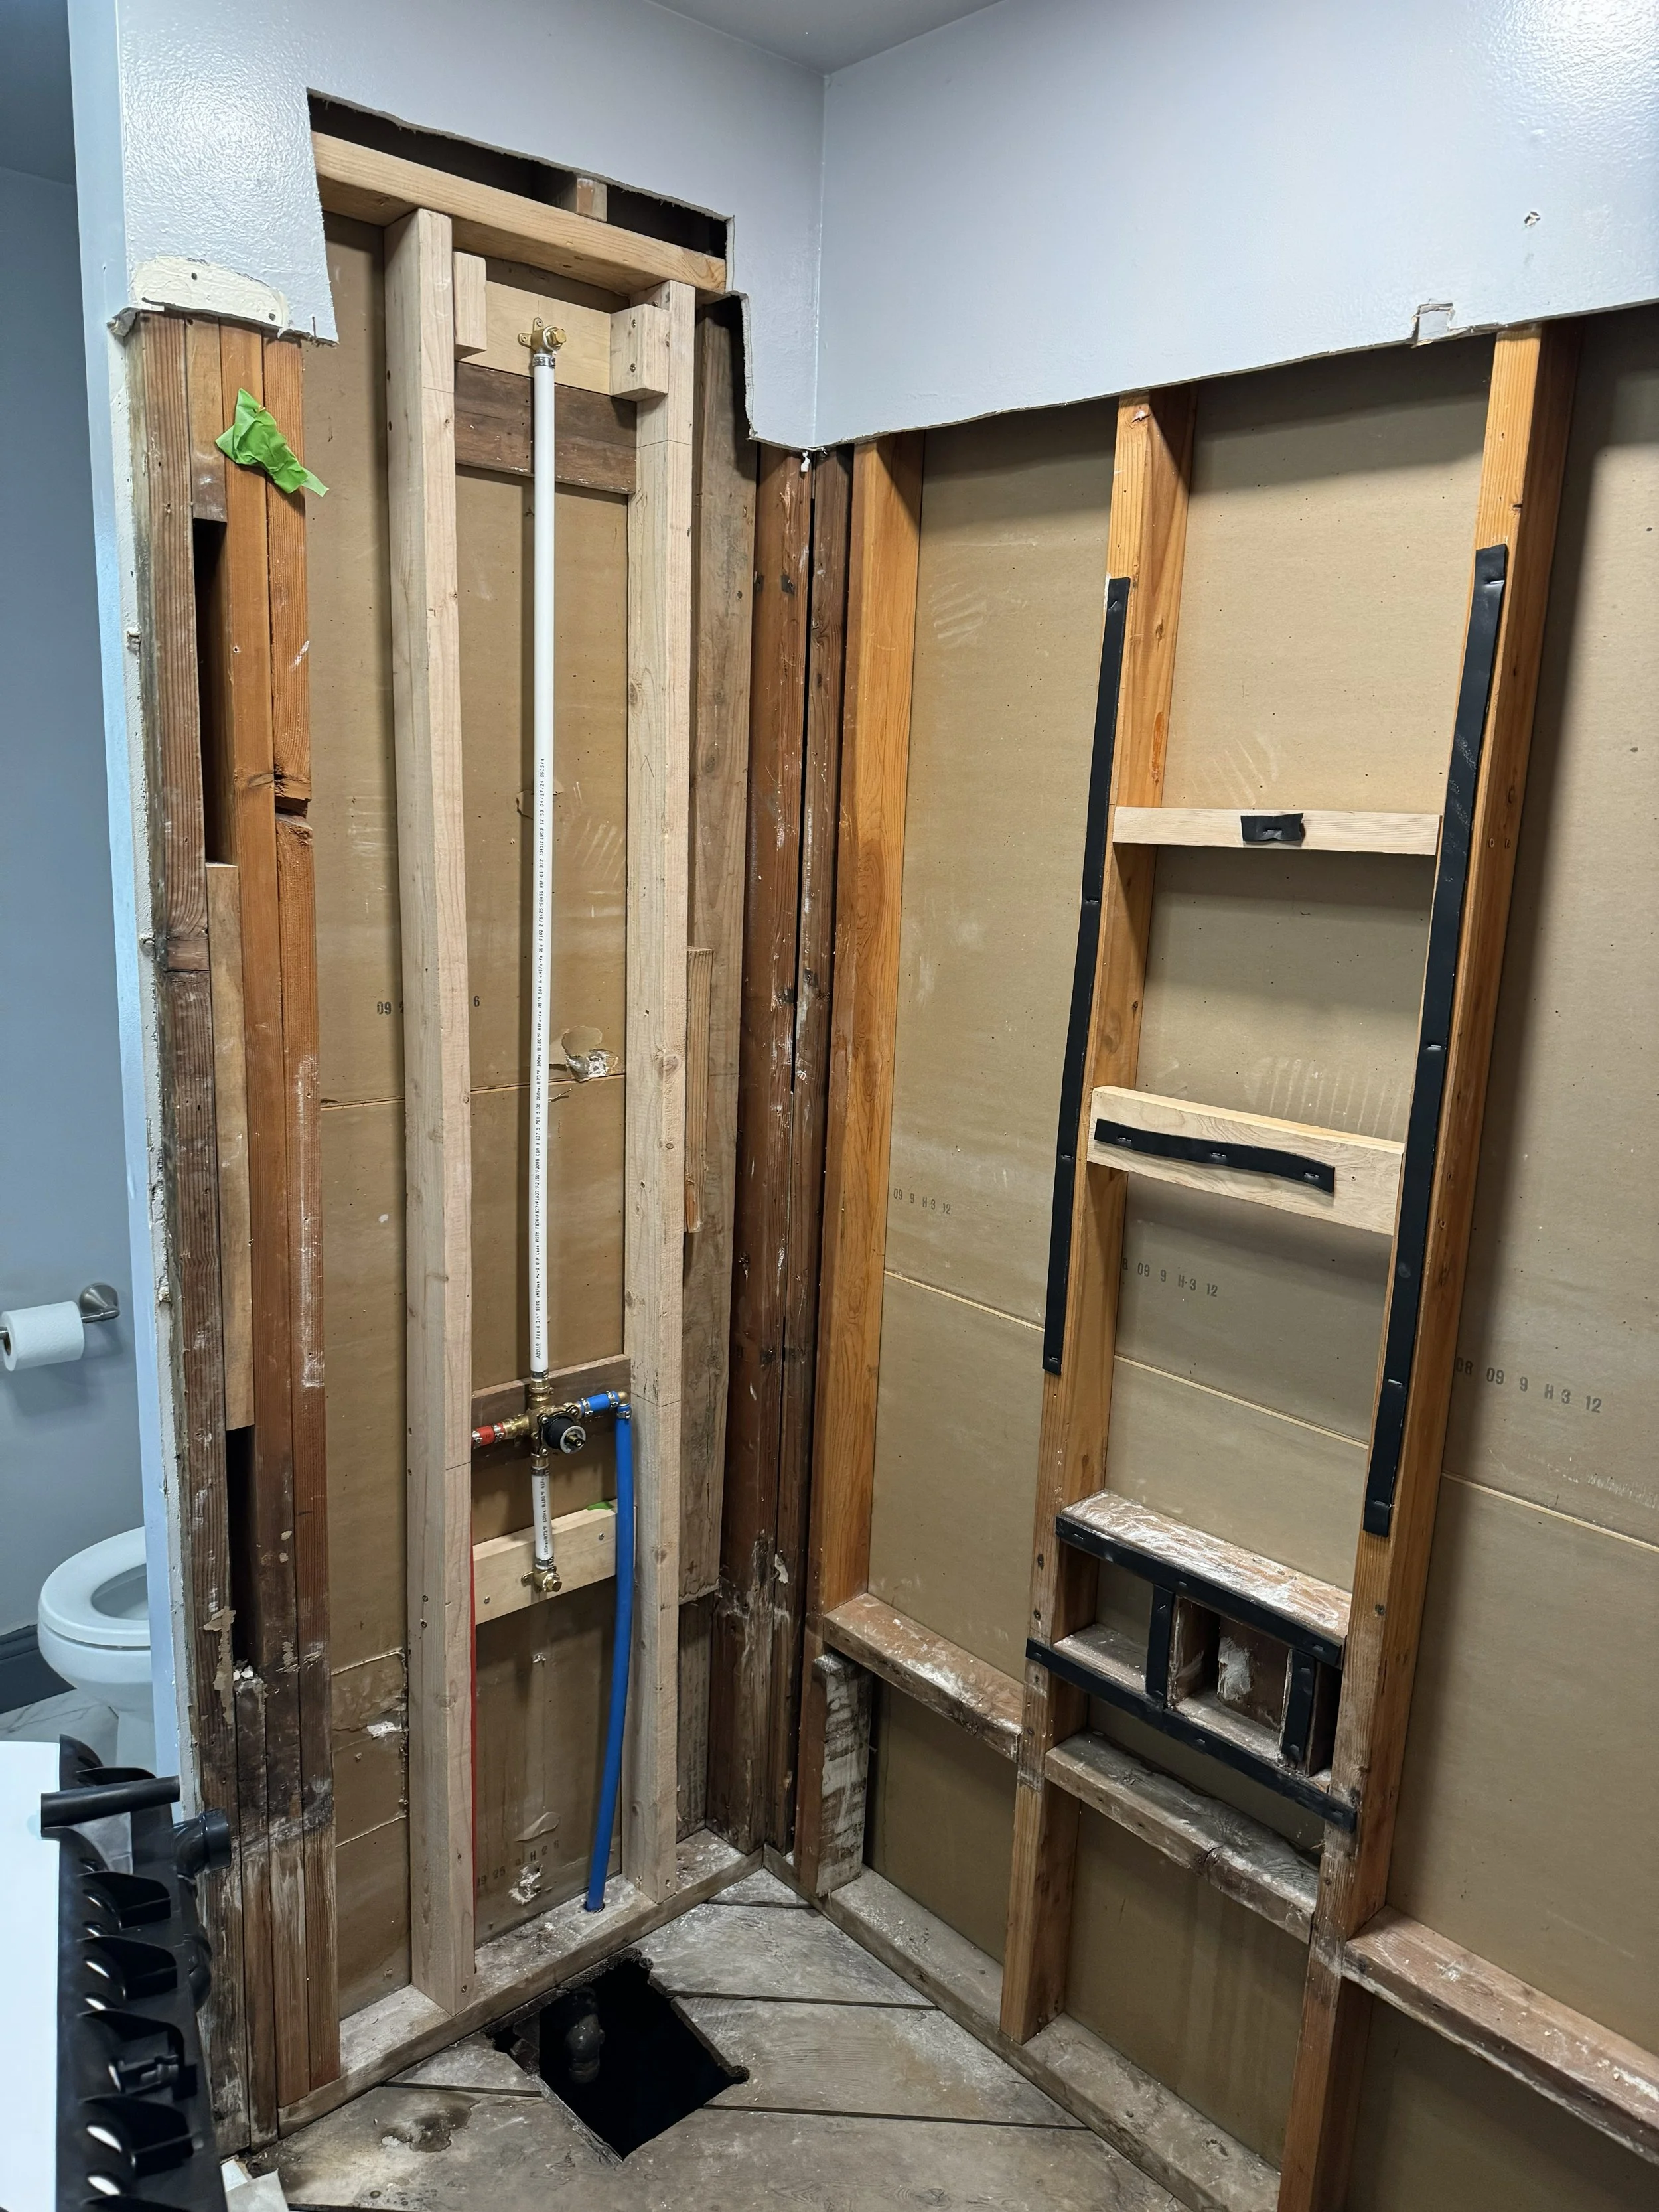
NEW PEX TUBING AND FRAMING
Once we finally tapped into the existing galvanized piping we ran new PEX lines from the hot and cold water supply to the mixing valve including lines to the tub and shower faucet. Additionally, we provided extra framing for the support of the PEX tubing as well as blocking required for the new glass shower door. Foam strips were added to the studs as required for the fiberglass shower surround.
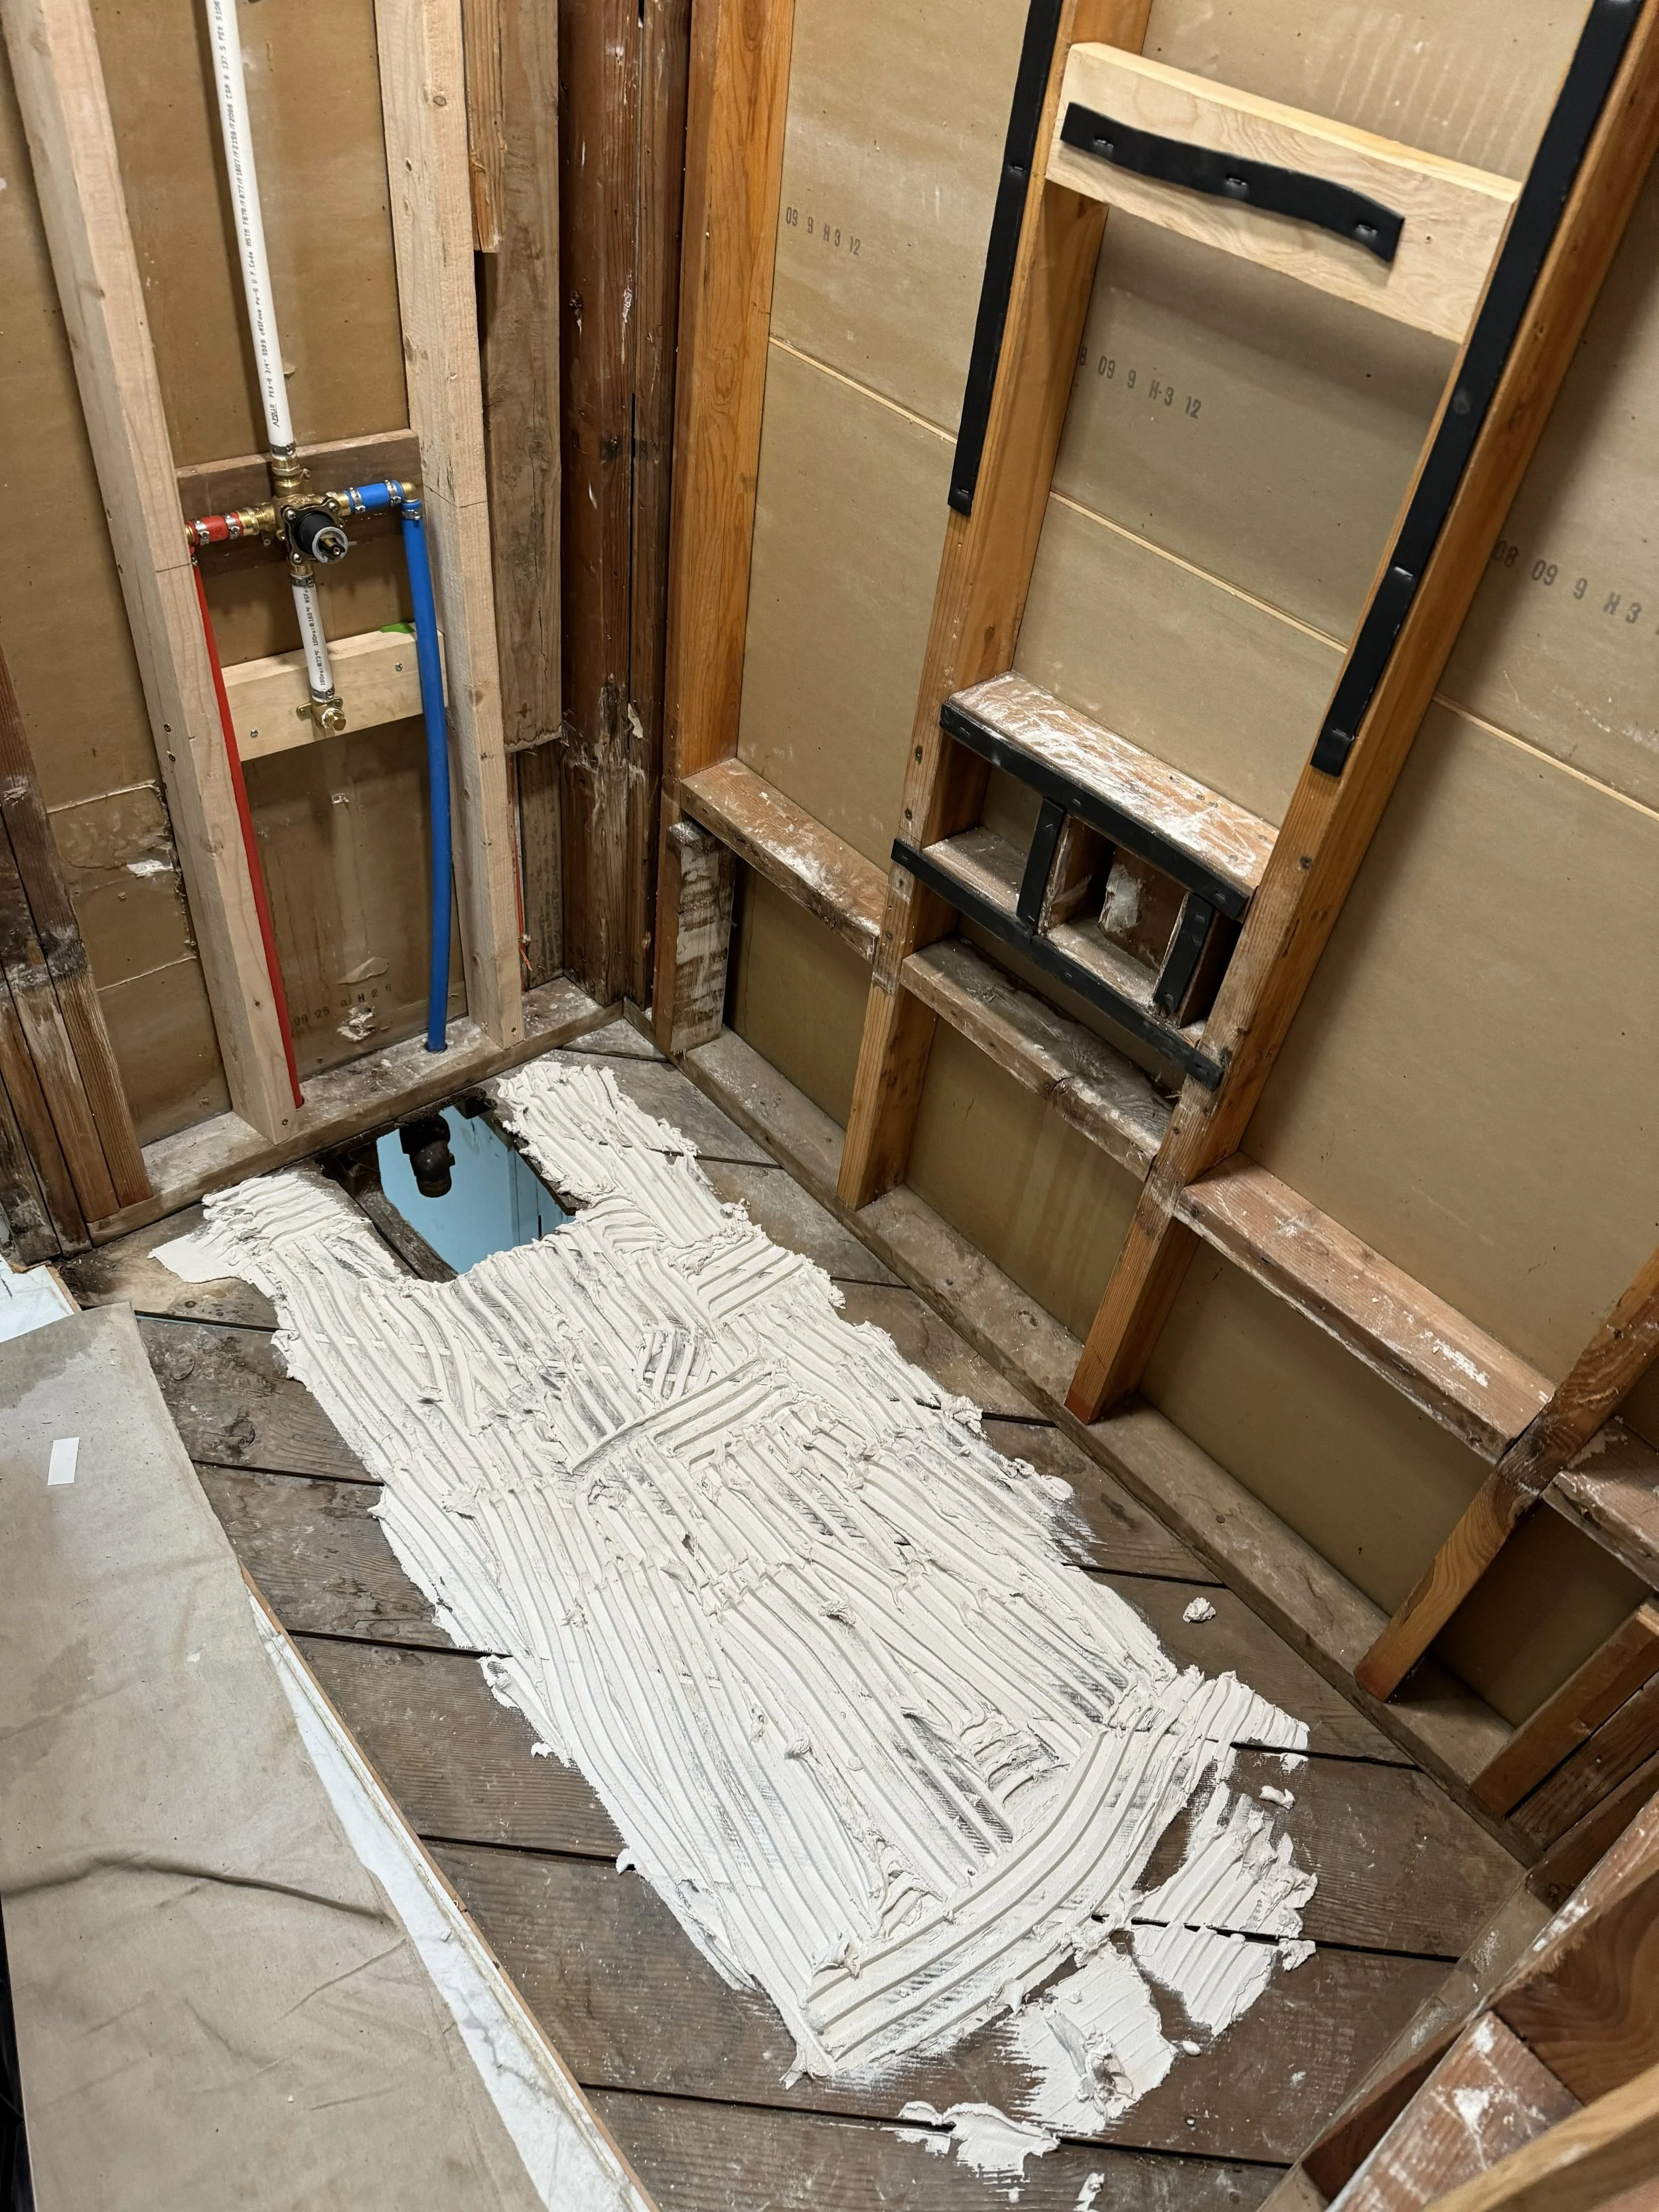
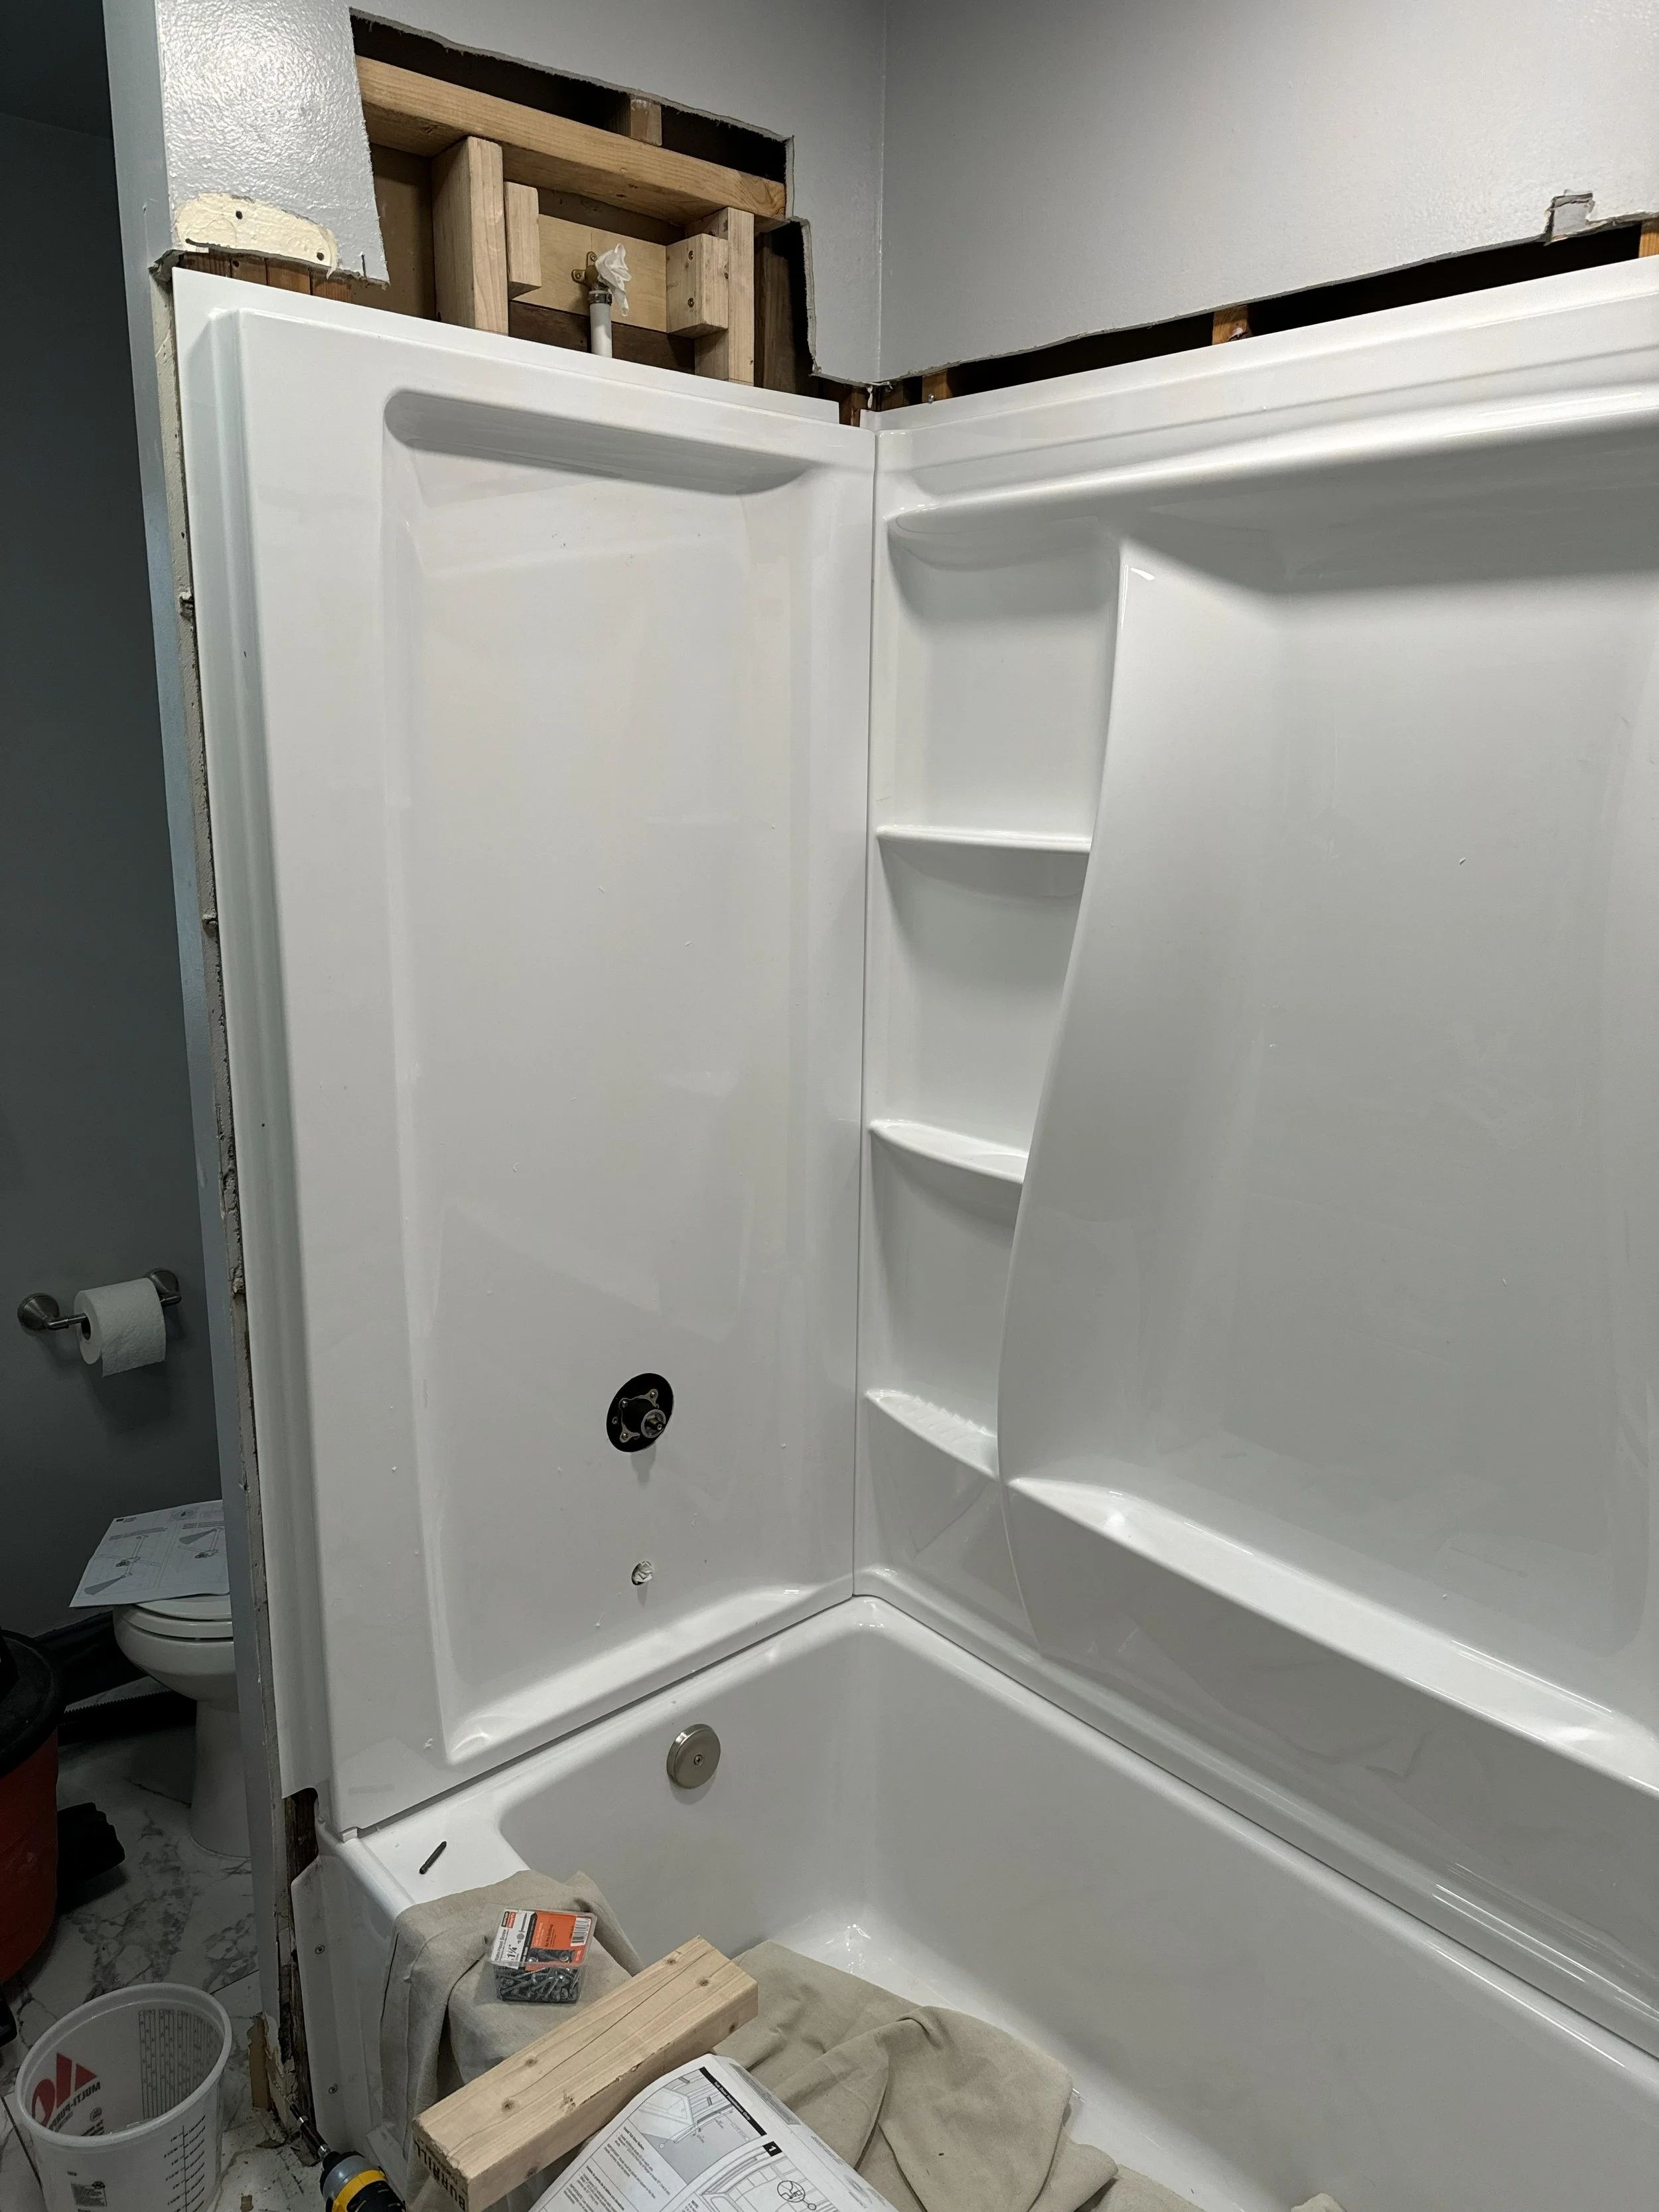
PREP FOR THE TUB
Once we completed the test fit of the fiberglass tub within the stud framing, including testing the waste line connection to the existing lines, we added a bed of mortar that the tub would set in.
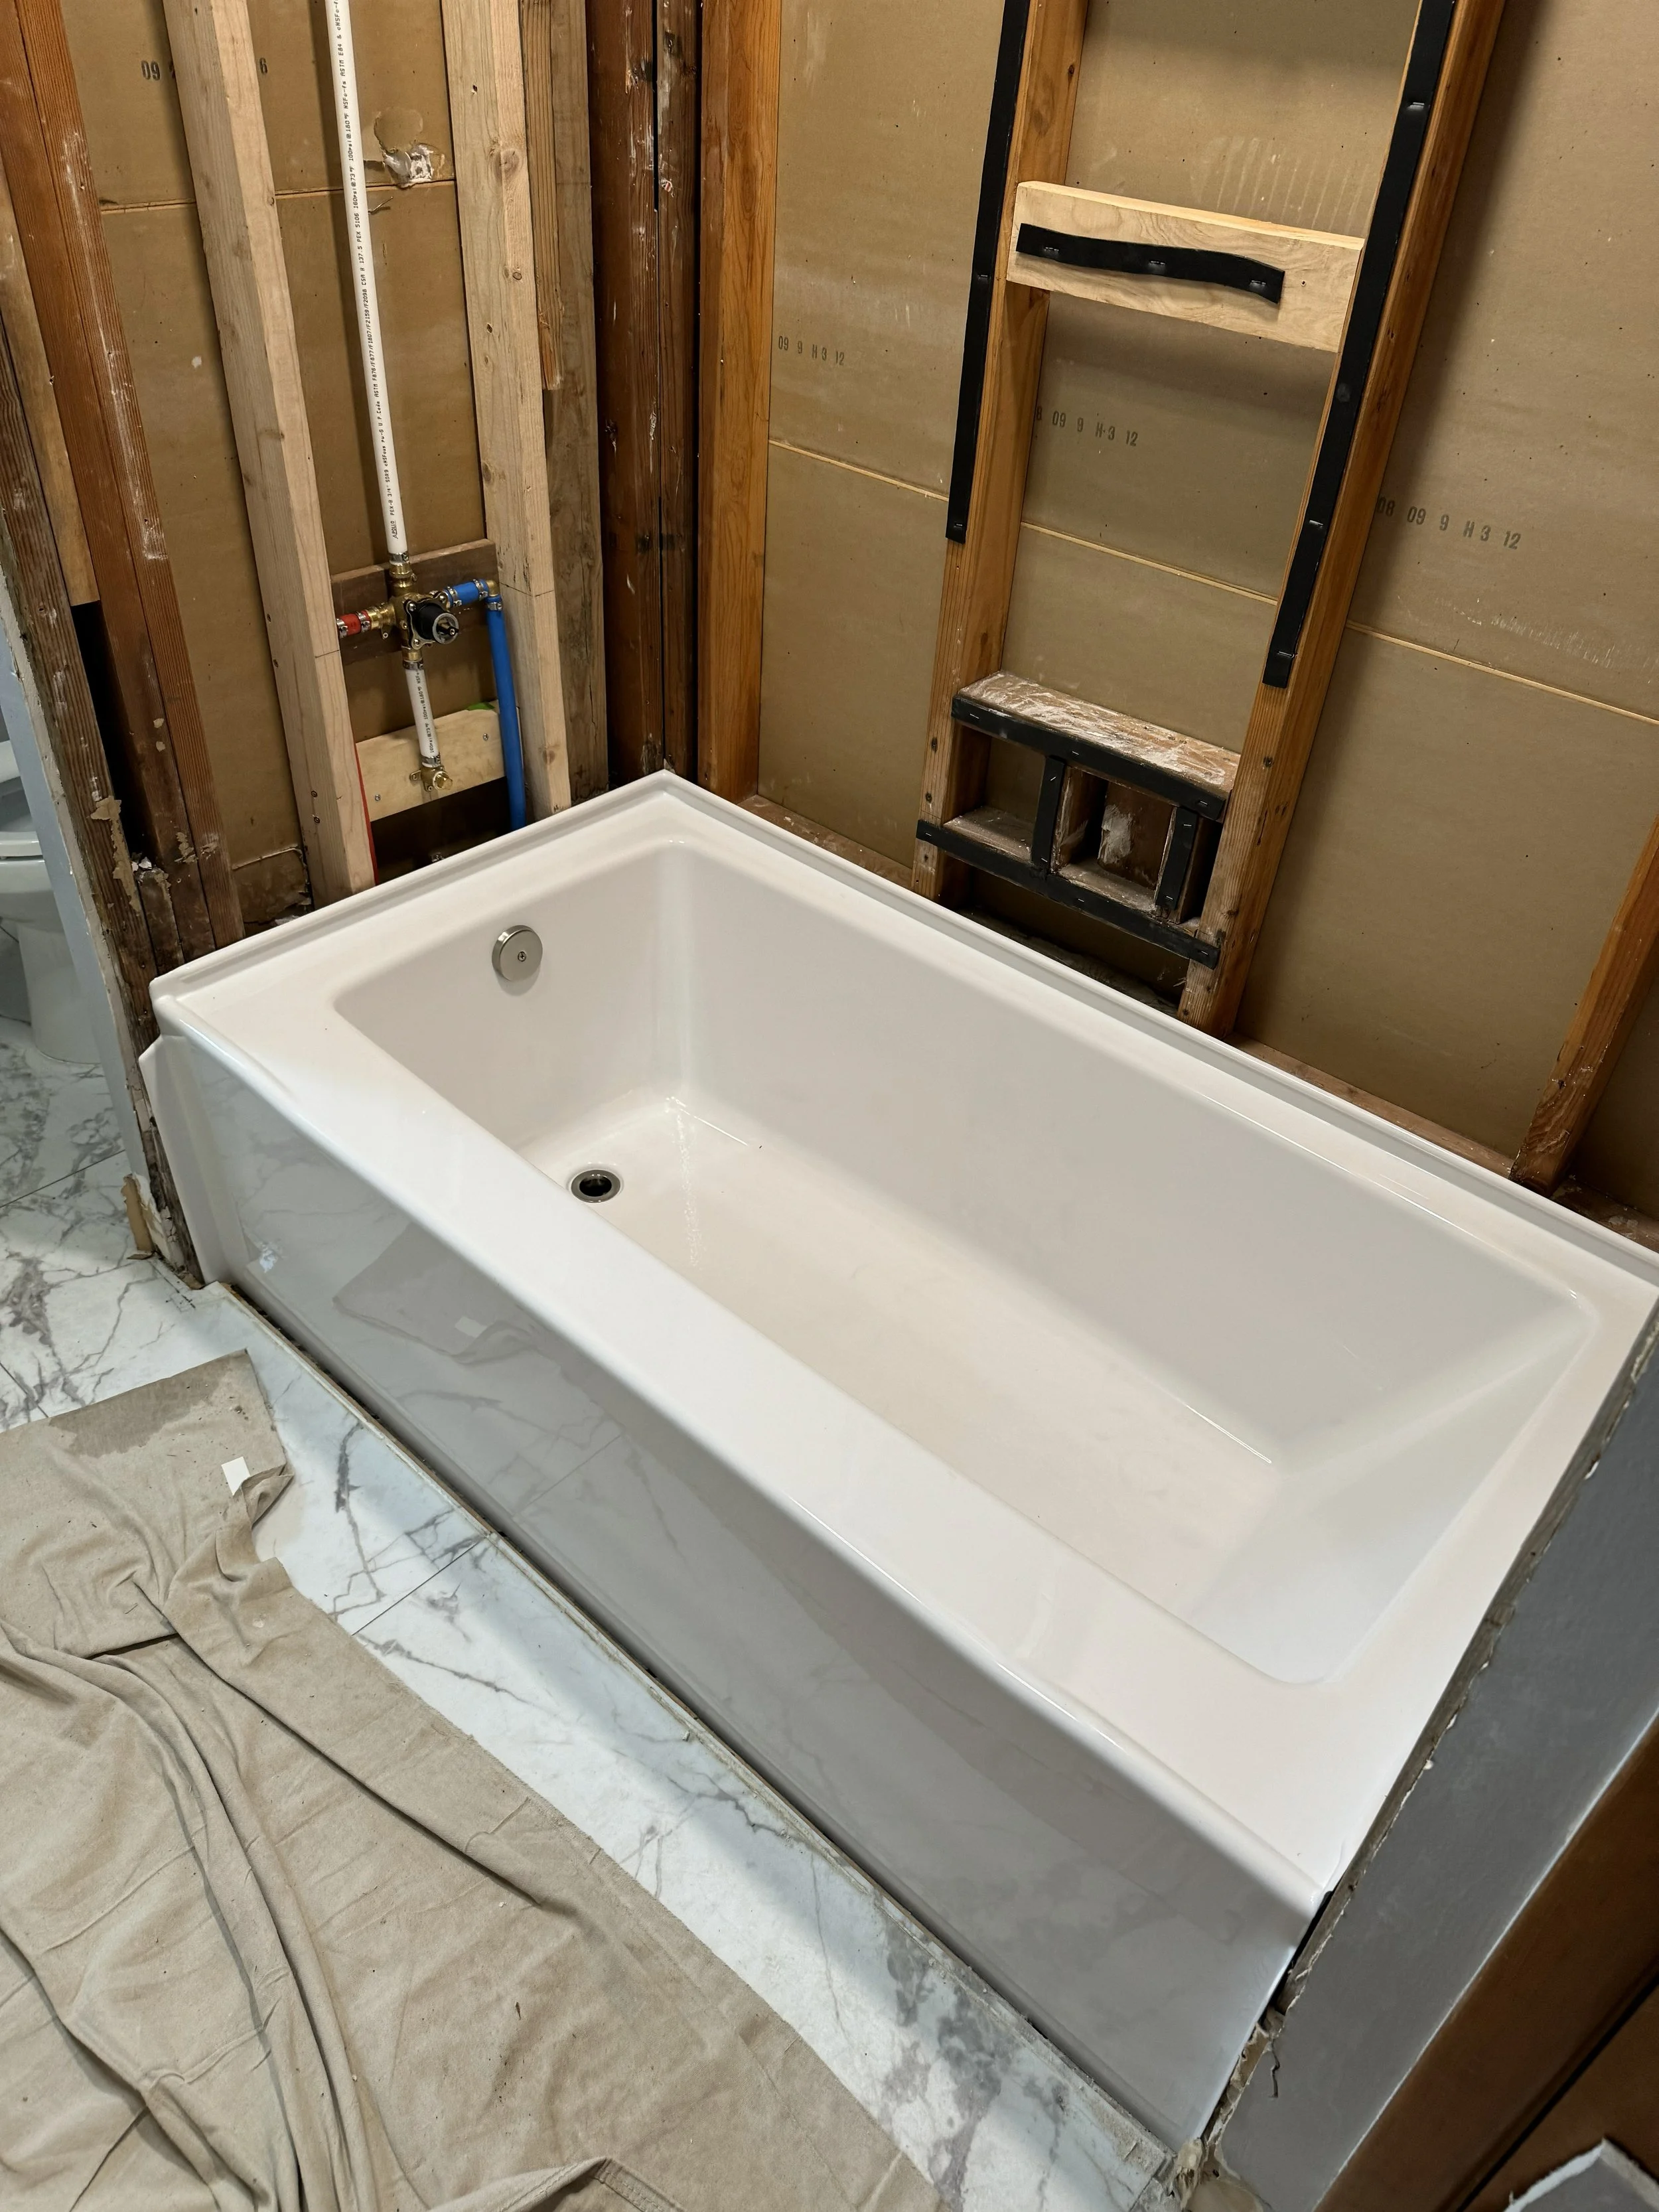
TUB INSTALL
It fits! Dropping in the tub after laying the mortar bed was satisfying experience because it was the first task that would actually show when complete. All the other prep work was behind the scenes and took longer than expected.
NEW PEX LINES
The red tubing is the connection to the existing galvanized pipe that supplies the hot water from the furnace, while the blue tubing is the cold water line. You can also see the existing P-trap from the shower/tub line that connects to the larger galvanized waste line.
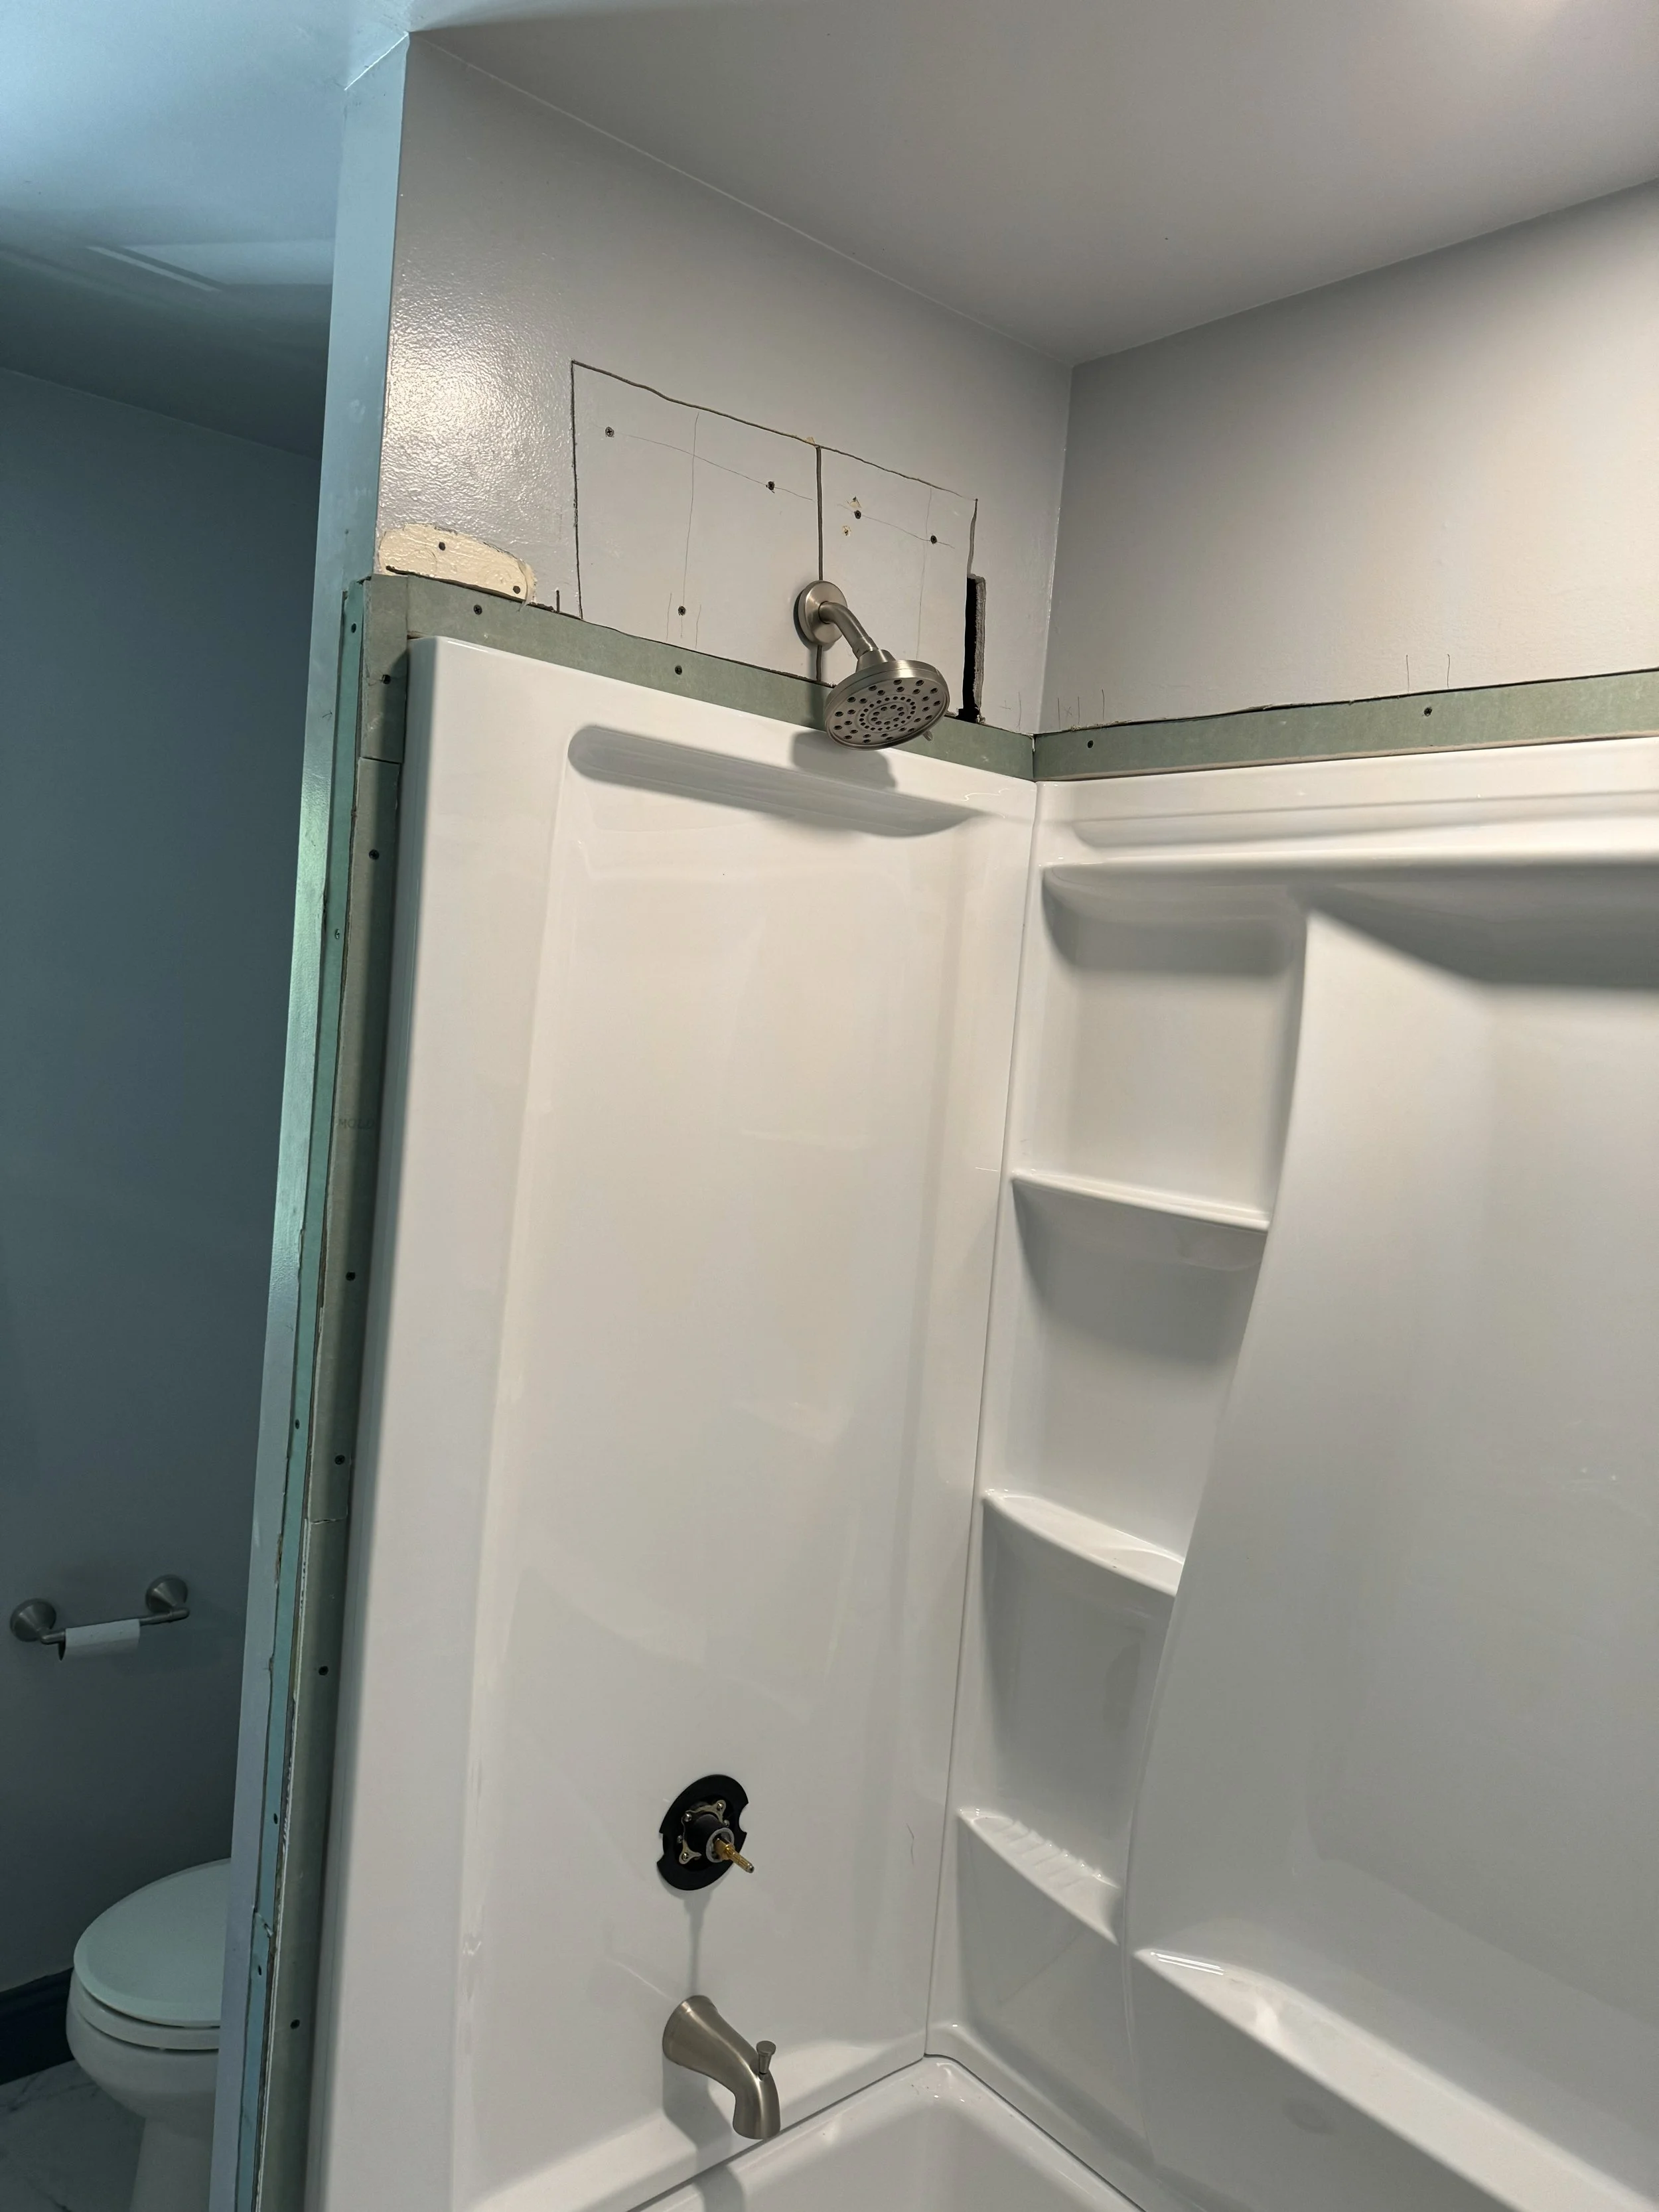
FIBERGLASS SURROUND INSTALLATION
Once the tub had fully set in the mortar, we began the installation of the fiberglass tub/shower surrounds. In addition to the foam stud liner, we added adhesive caulking where indicated by the manufacturer. Before the caulking, we test fit each piece together and separately to make sure we everything properly aligned.
Once the tub surround was installed, and the tub hardware installed, we started adding mold and moisture resistant drywall.
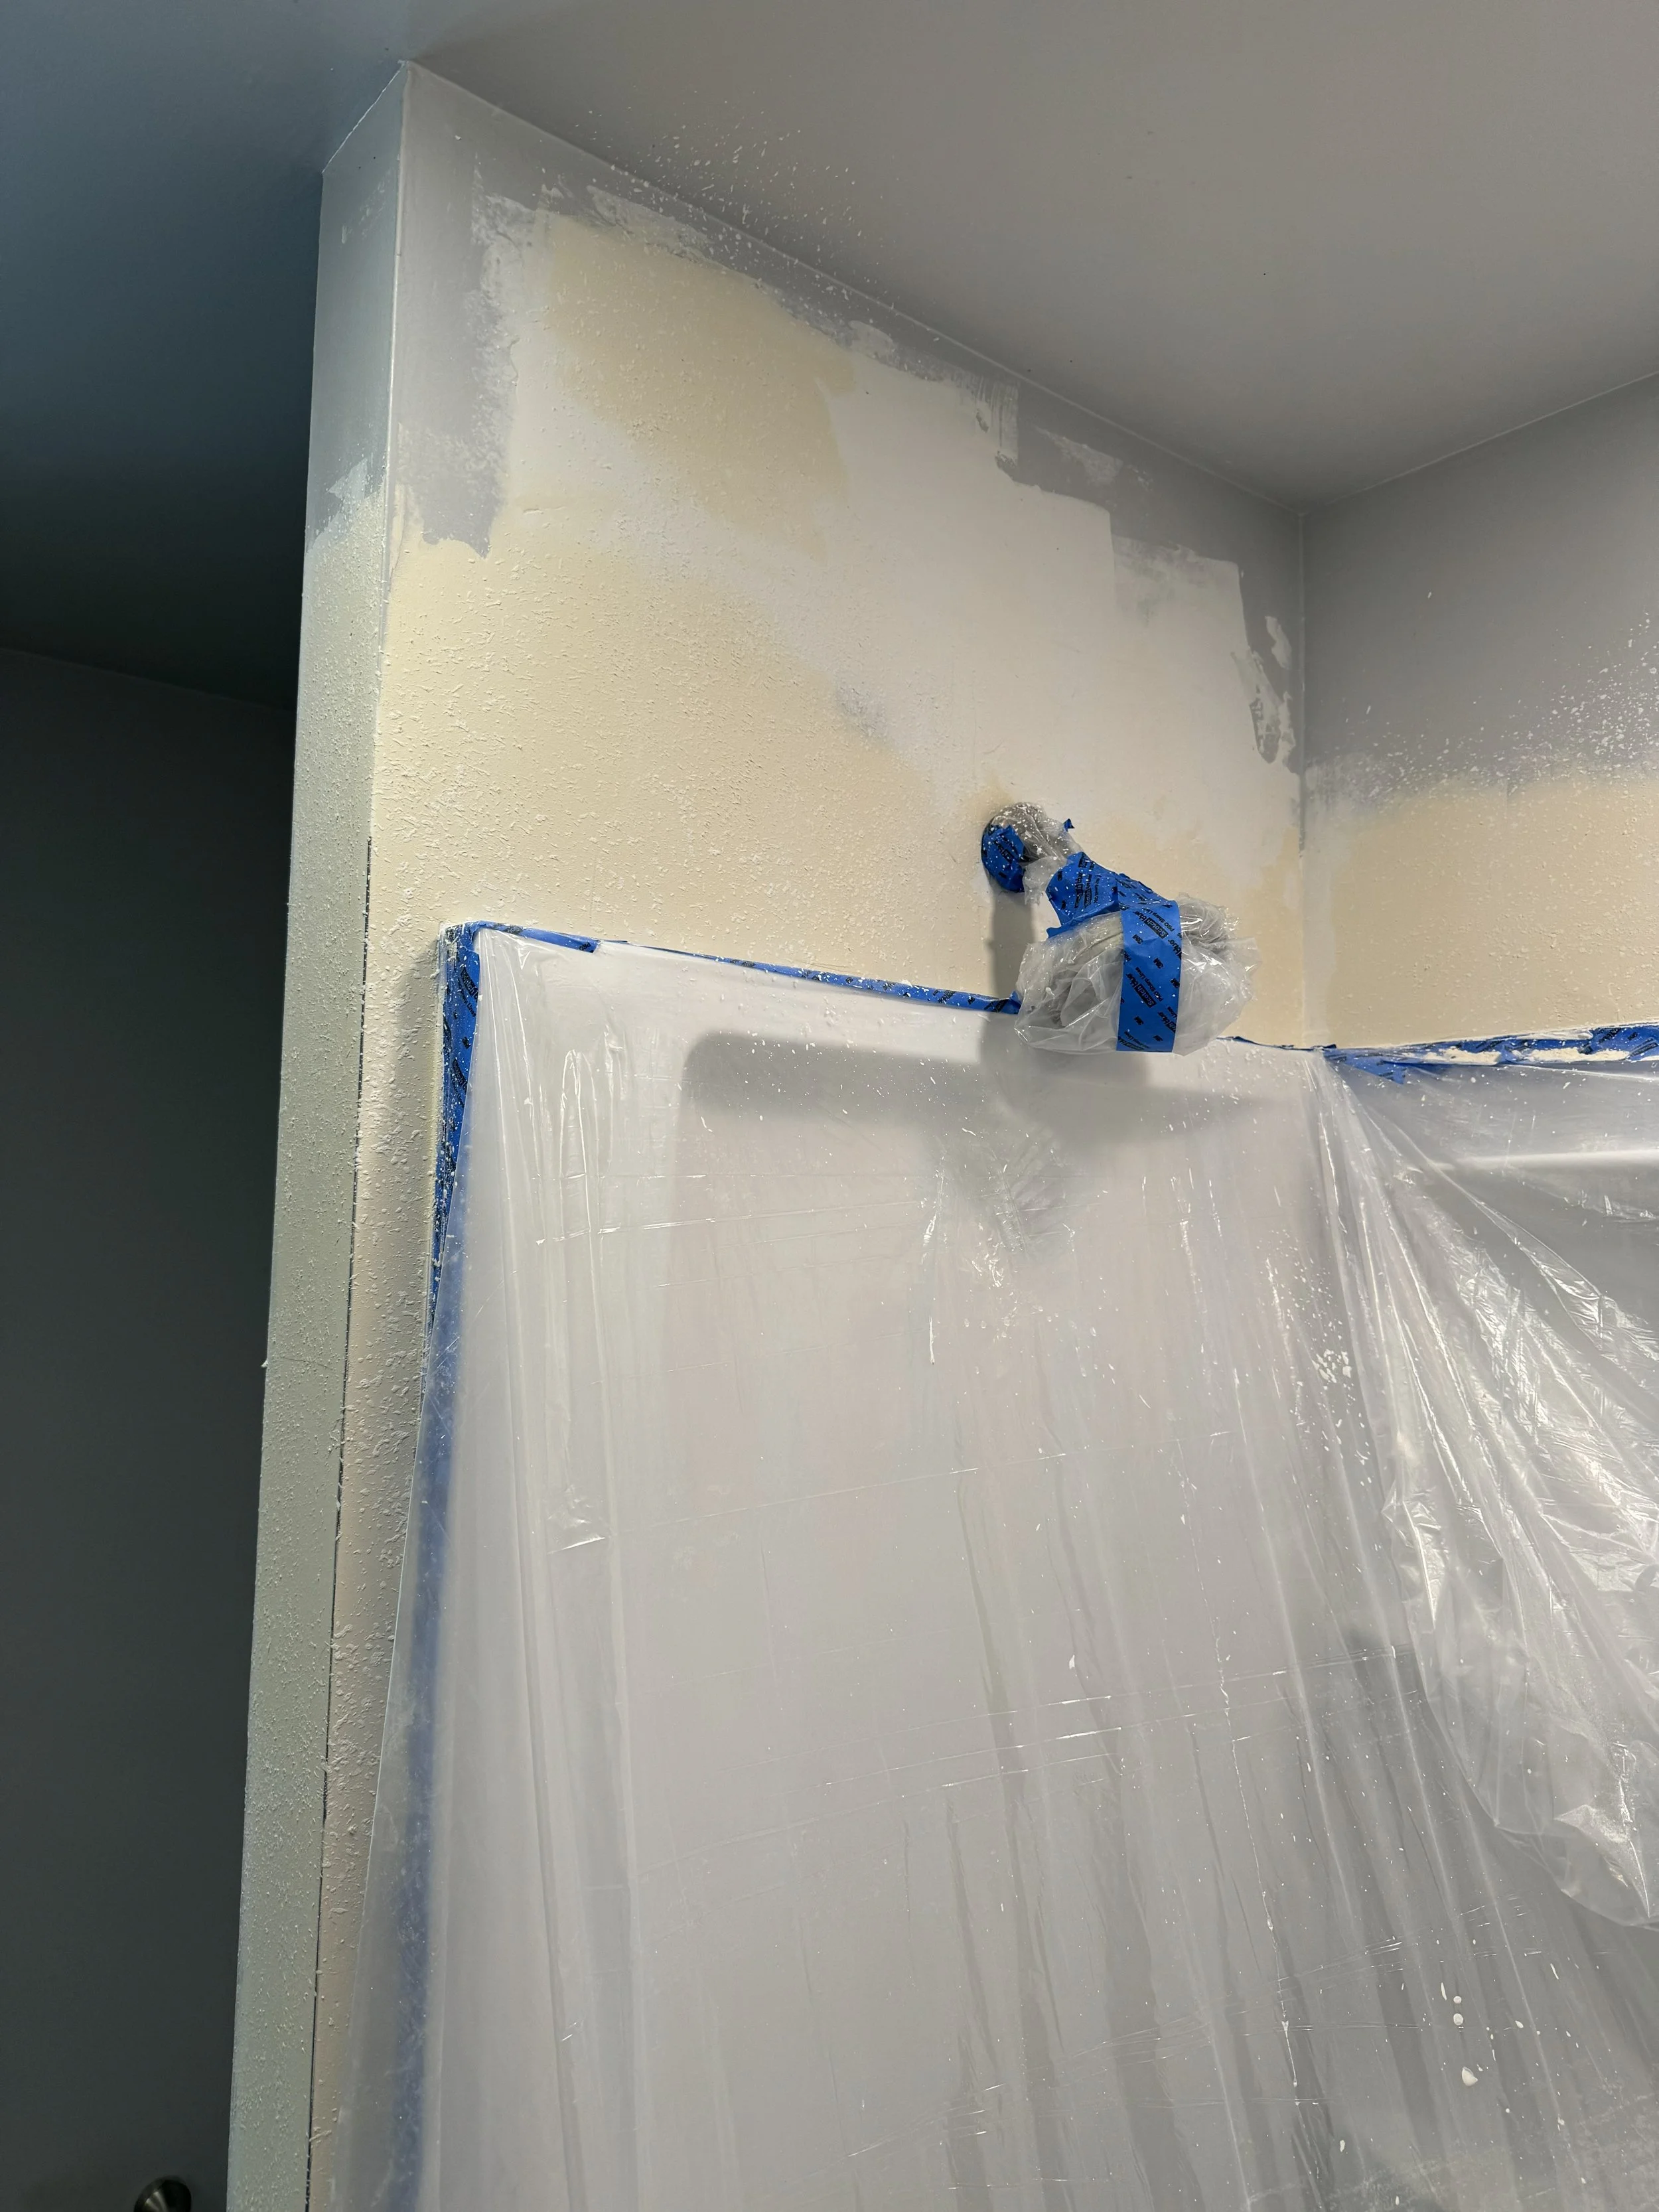
COMPLETION OF GYPSUM DRYWALL
The green drywall shows the area of new gypsum added that follows around the fiberglass panels. Some fiberglass panels can be installed to the outside, we knew ours would be fixed directly to studs, thereby overlapping our gypsum with the fin on the fiberglass panels helping with water and moisture control. Some pieces of drywall were reused like the two squares around the shower head.
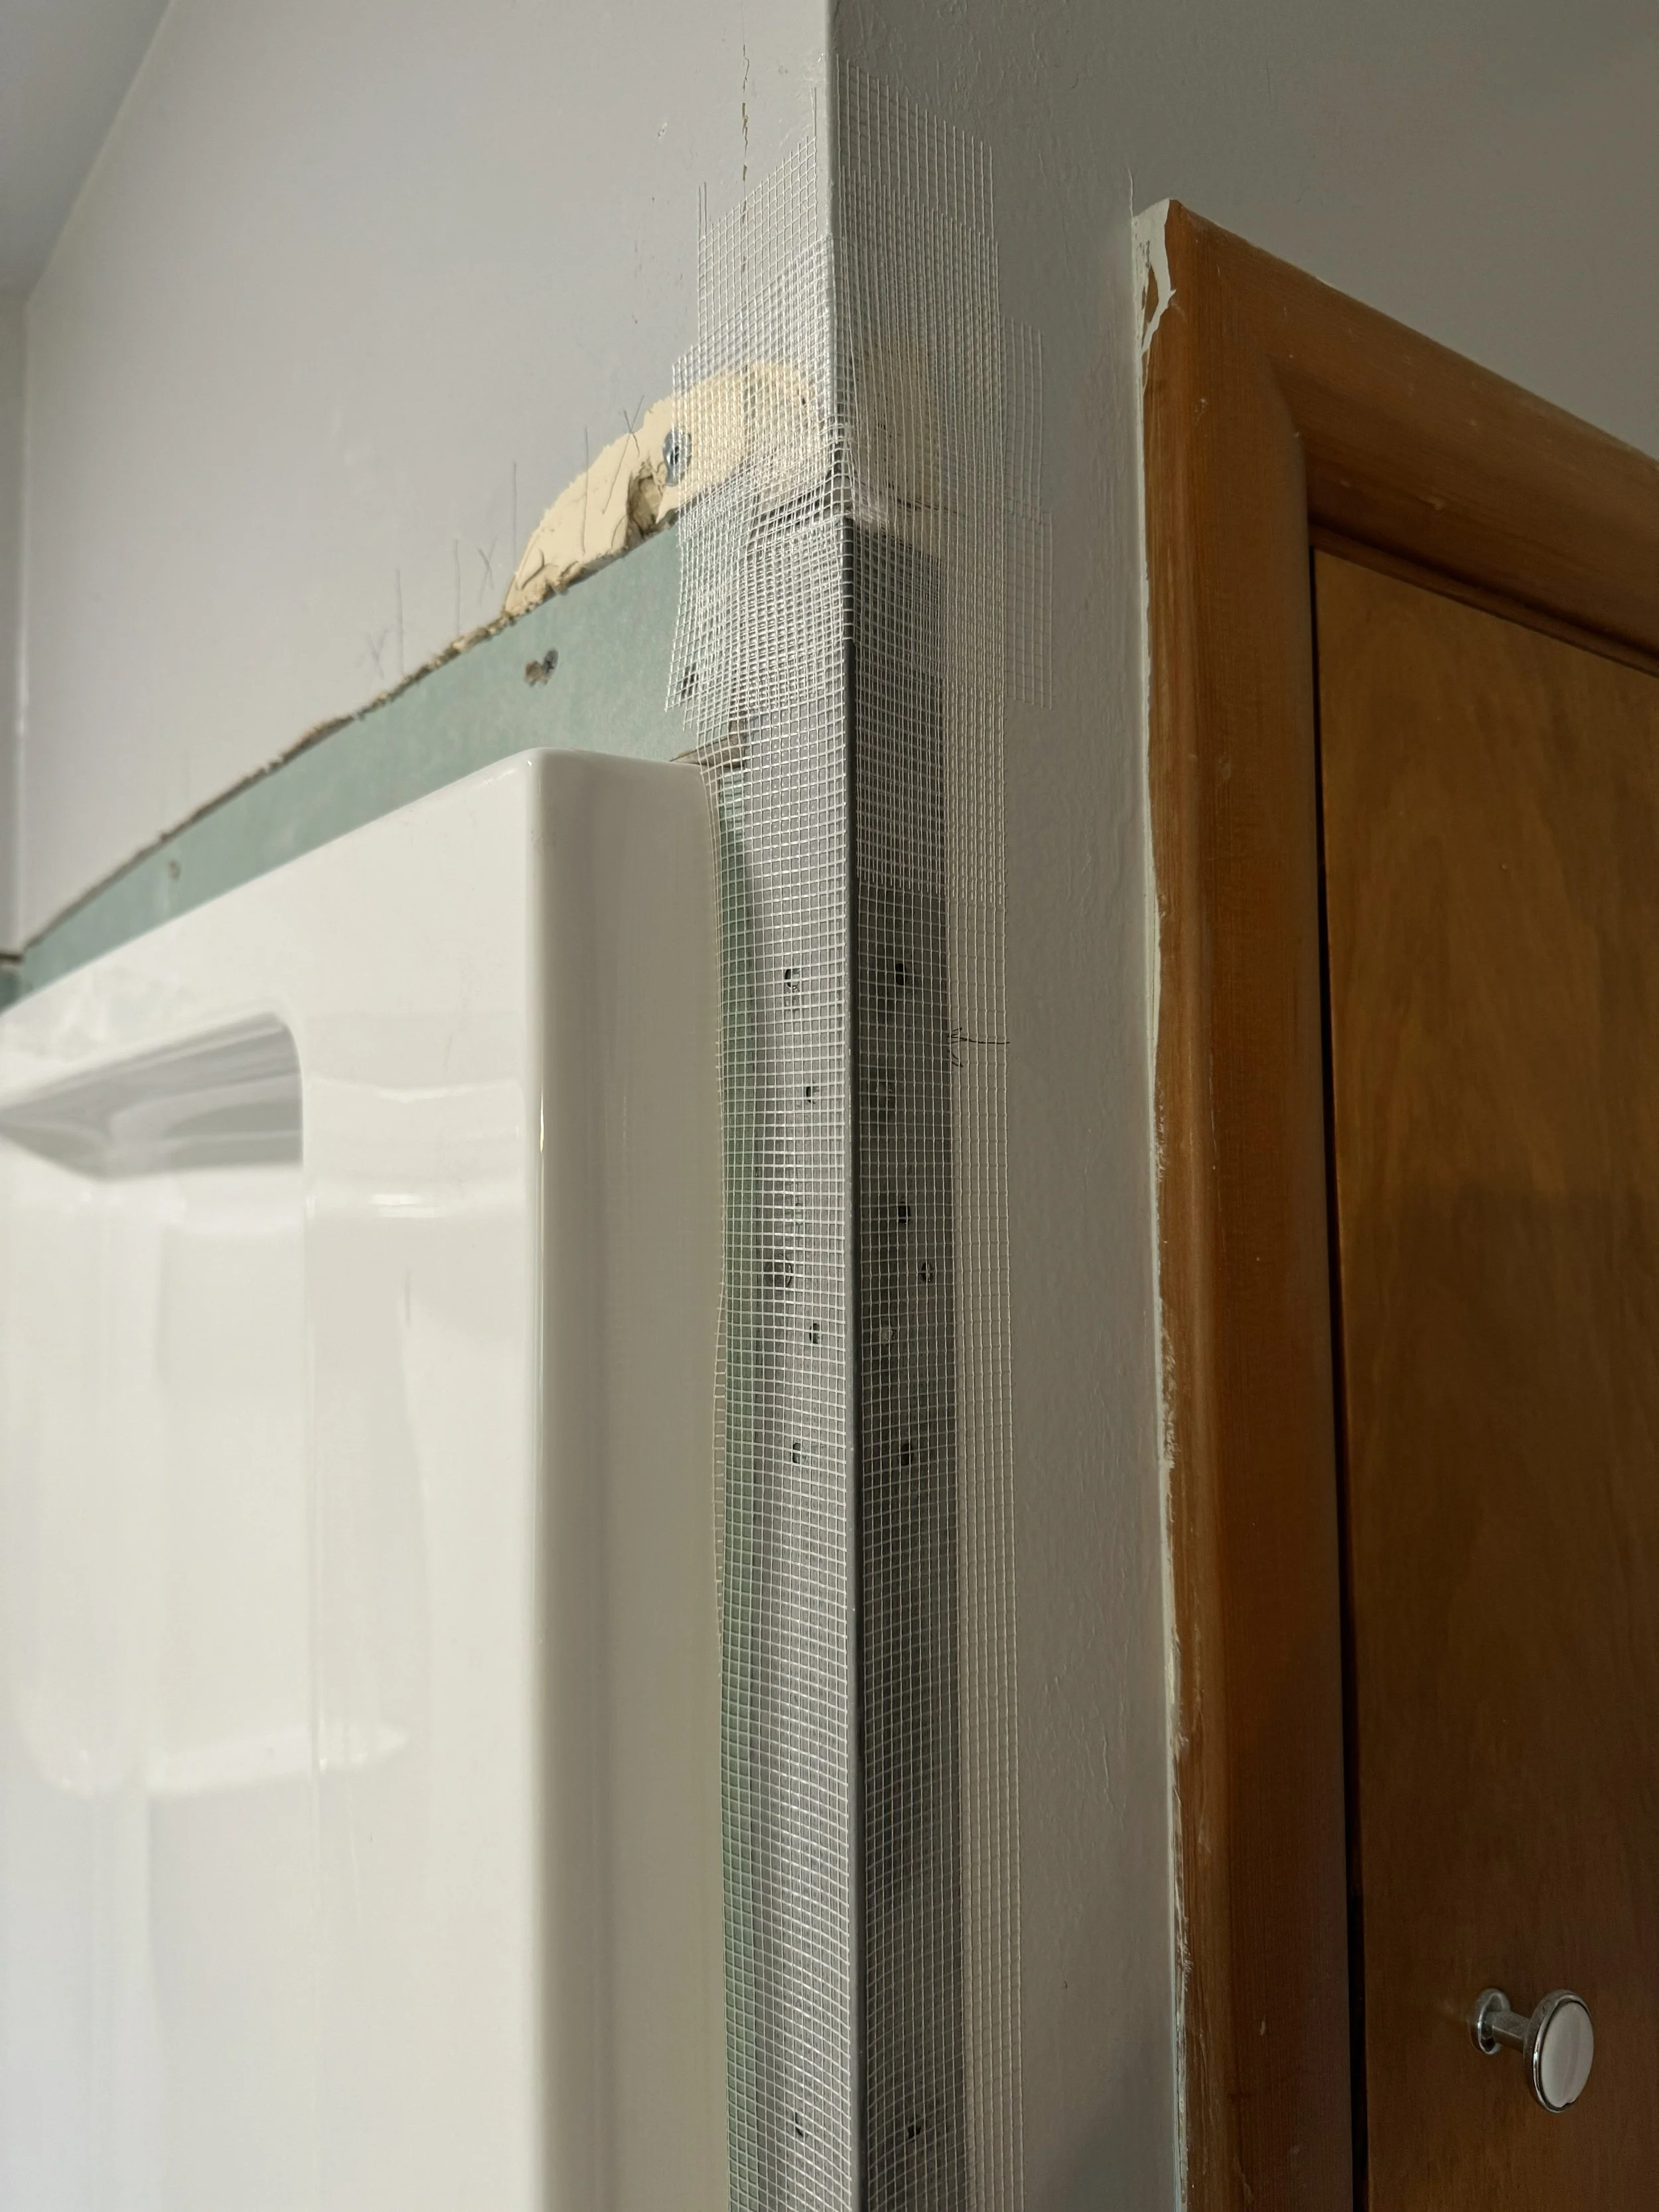
GYPSUM TAPING
I’m not sure why, but the taping of gypsum edges and cracks was very satisfying. This was the beginning of the corner taping condition where you can also see the metal bead corner below the taping. It was extremely delicate and tricky trying to fasten thin strips of gypsum panel without cracking the gypsum hand cut strips, all while missing any screws or objects beyond the panels themselves.
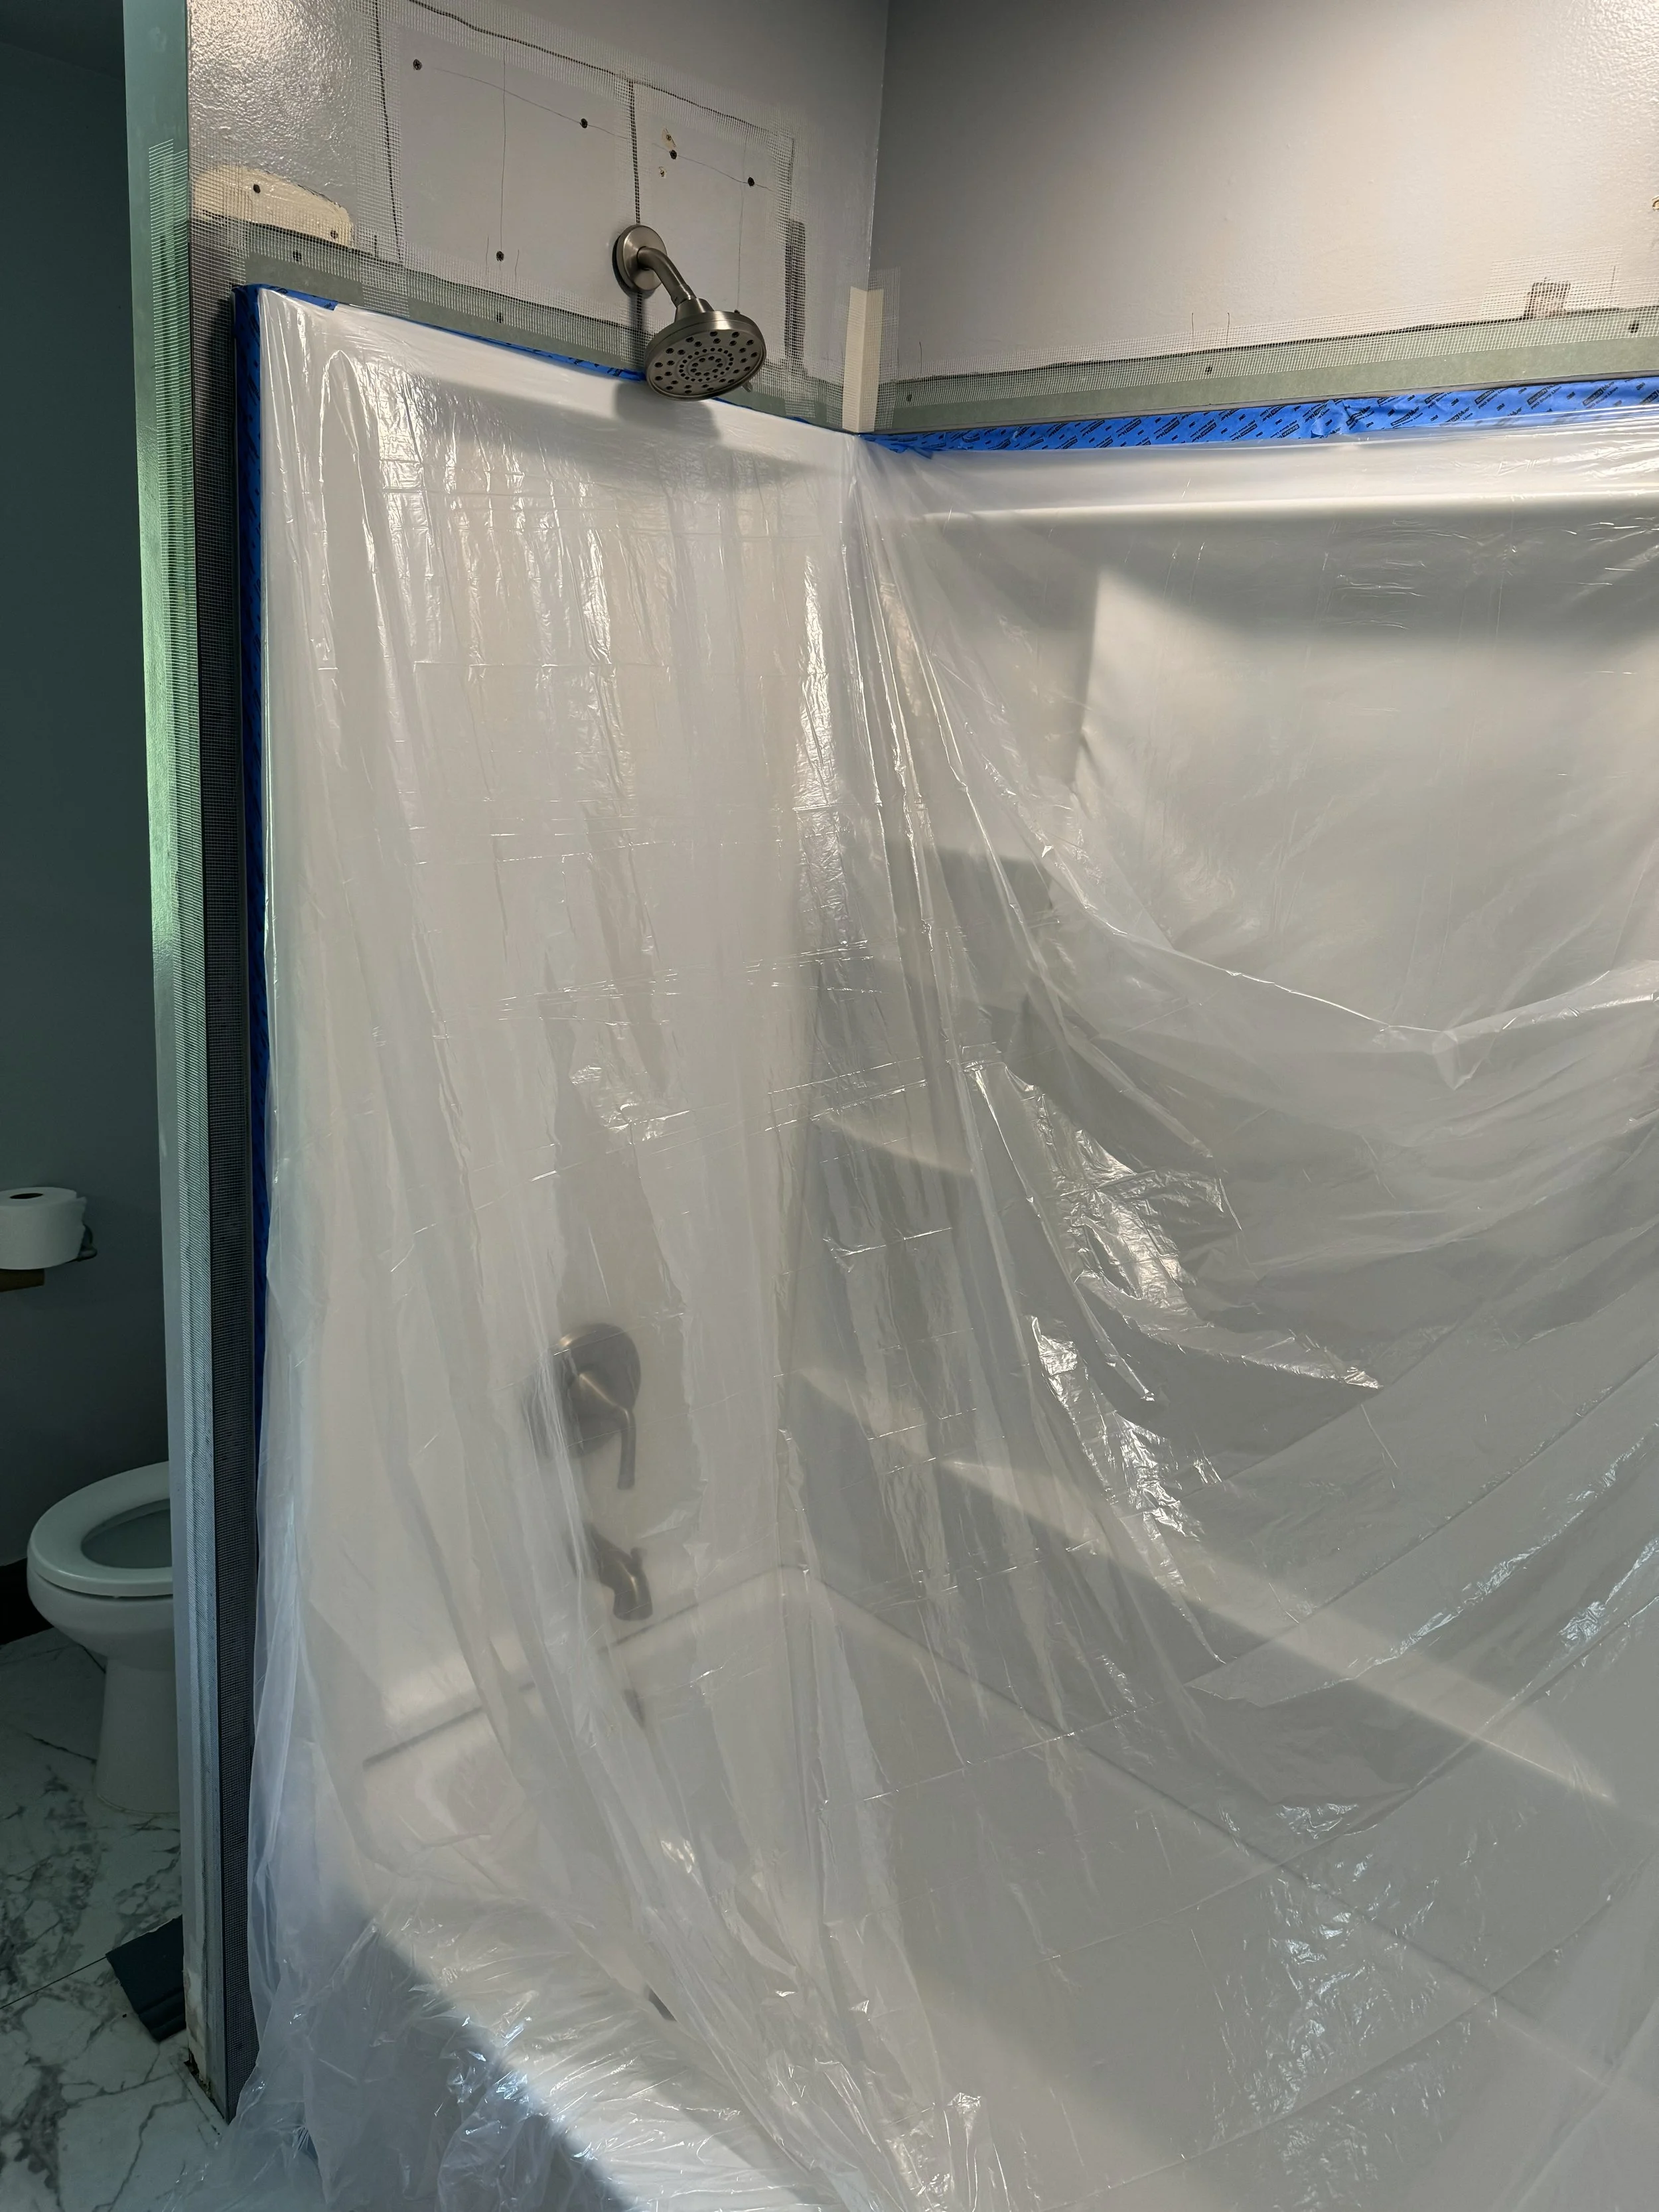
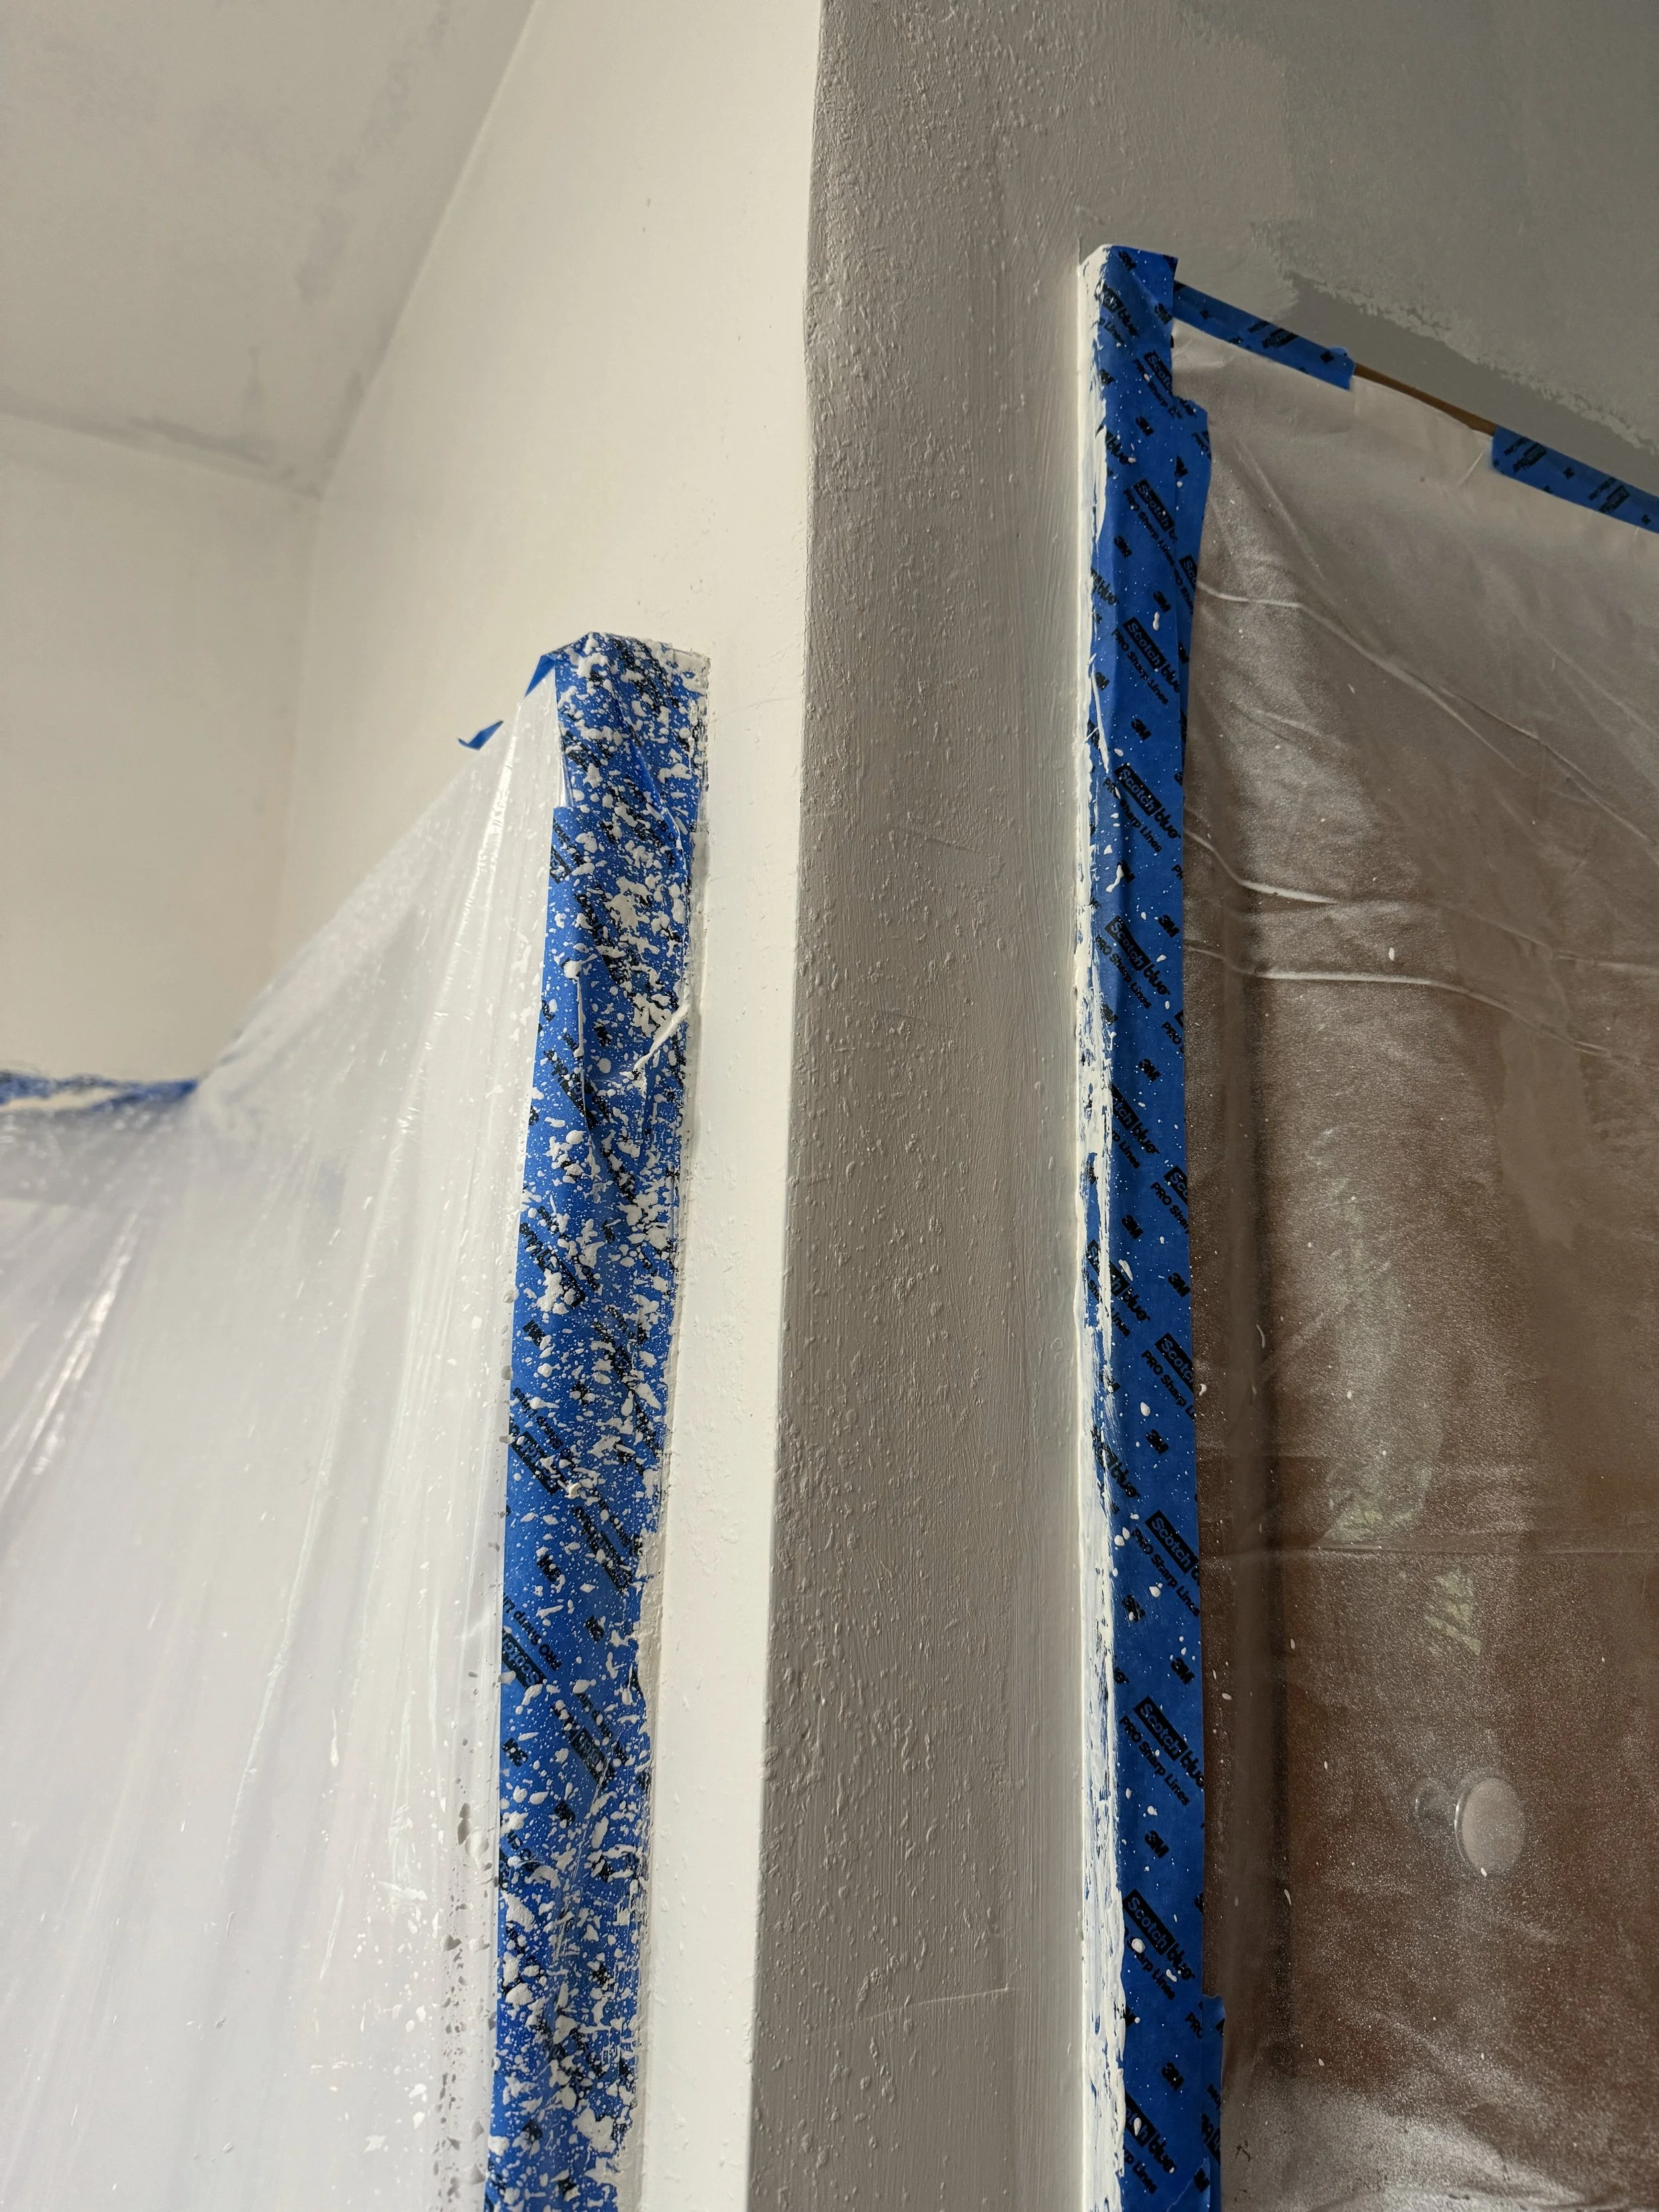
MUD COAT PREP
Once all edges and corners of the gypsum panels had been taped, it was time to cover the fiberglass panels with a sheet of plastic. In some of the videos I watched, some professionals did not cover the surround, but I am not a professional and knew I would be spilling mud everywhere. I also planned on spraying wall texture and knew that would be messy.
DRYWALL MUDDING
I ended up doing 2-3 coats on certain areas starting with an all purpose joint filler as I had a lot of joints and taping to fill in. Once that fully dried (took 2 days total), I added the second coat with a wider knife and really tried to smooth out the wall planes, finally finishing with a lighter third coat with a wider knife. There are probably a few sections where I could’ve spent more time feathering or filling in gaps, but for now I was satisfied.
WALL TEXTURE
Now this is where I see a lot of variety in technique and skill and something I have yet to conquer. Most professionals will use a handheld paint gun that can handle a lighter mud coat that is sprayed onto the walls. I didn’t opt for that machine (yet) and so I bought the wall texture spray bottle instead. The first bottle I purchased was a dud and ended up spraying out in clumped bubbles like barnacles to the can. I’m just glad the rest of the bathroom is being remodeled because it was a mess. The second bottle worked just fine.
PAINT REVEAL
After the texture was sprayed and fully dried, it was finally time to paint. I left the plastic protection cover over the fiberglass surround so that I could paint fast and loose, not having to worry about paint marks on the tub. They would’ve been able to come off easy, but I know my painting precision drops drastically when I’m in a hurry.
After the installation of the fiberglass surround panels and the mortar/adhesive has dried, we grouted all seams with white caulking.
SHOWER DOOR INSTALL
It’s important to read ahead when tackling any project and to fully understand what each item requires and how it will be provided. Case in point, the built up stud framing that the shower door top rail attaches too. Luckily, I read the fiberglass surround instructions forward and backwards and noticed the part about additional stud framing for a glass door install. That could’ve been a costly mistake to remove the fiberglass panel just to add additional studs! I would’ve opted for a shower curtain at that point.
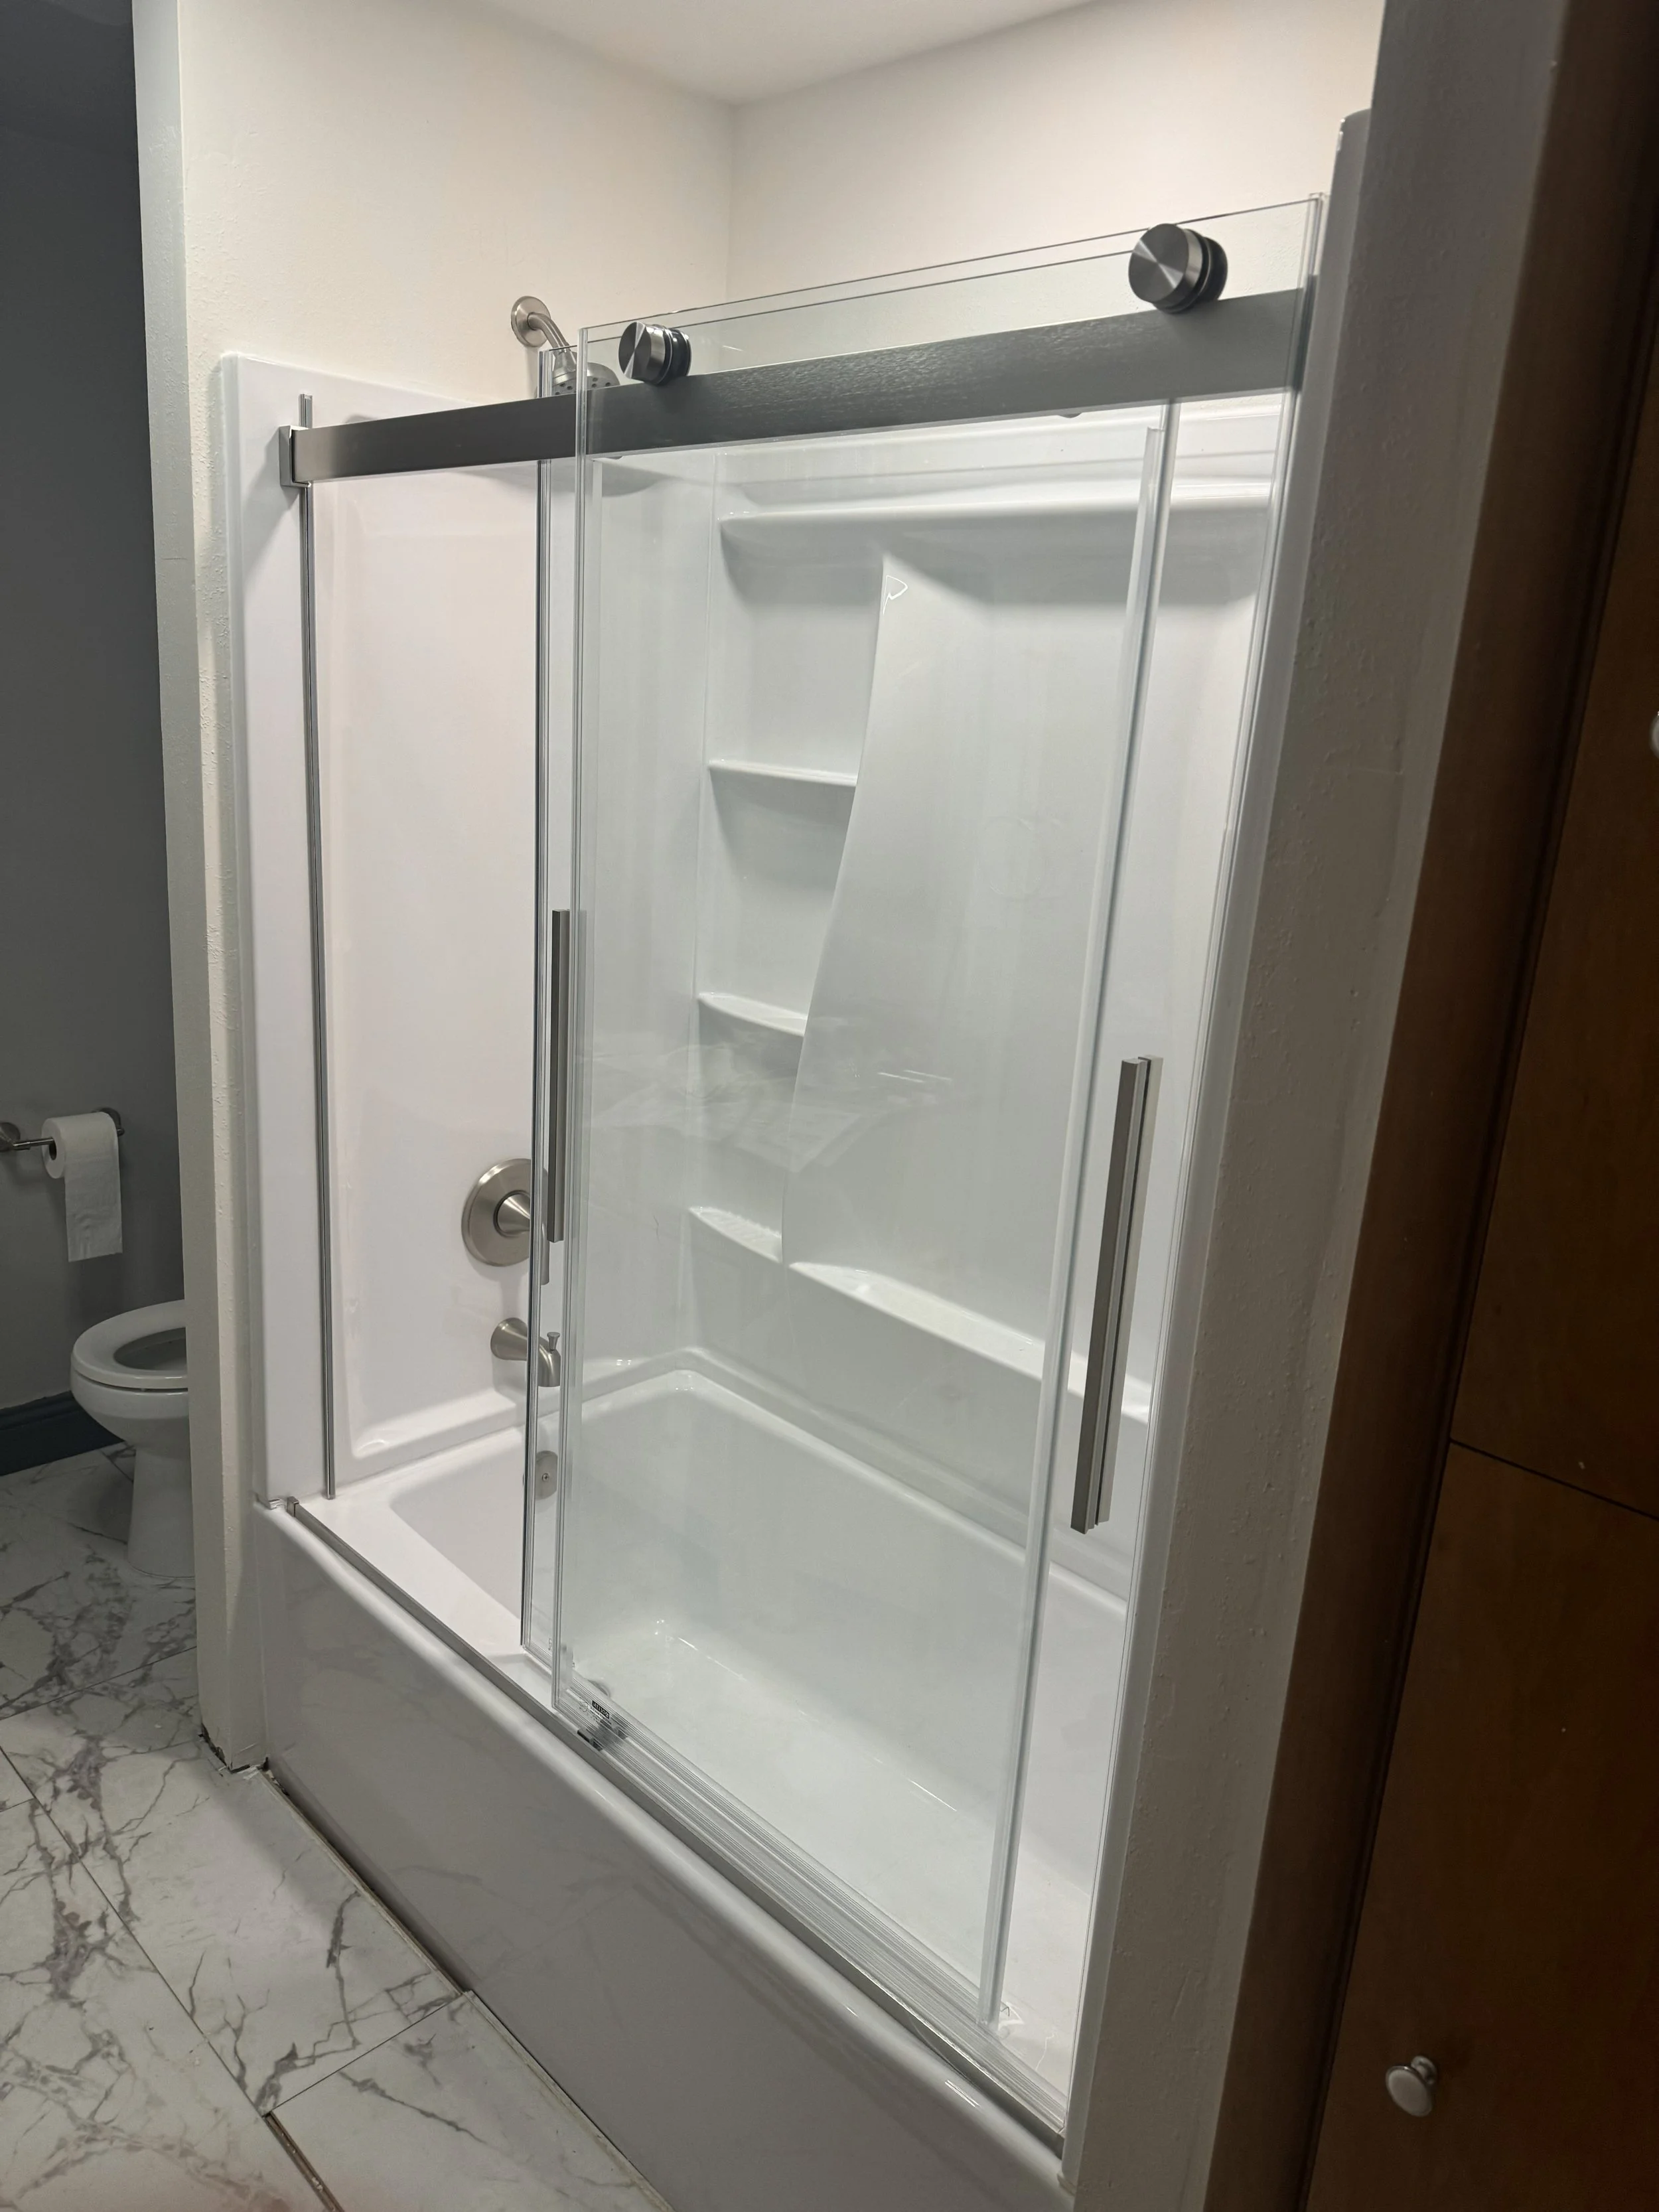
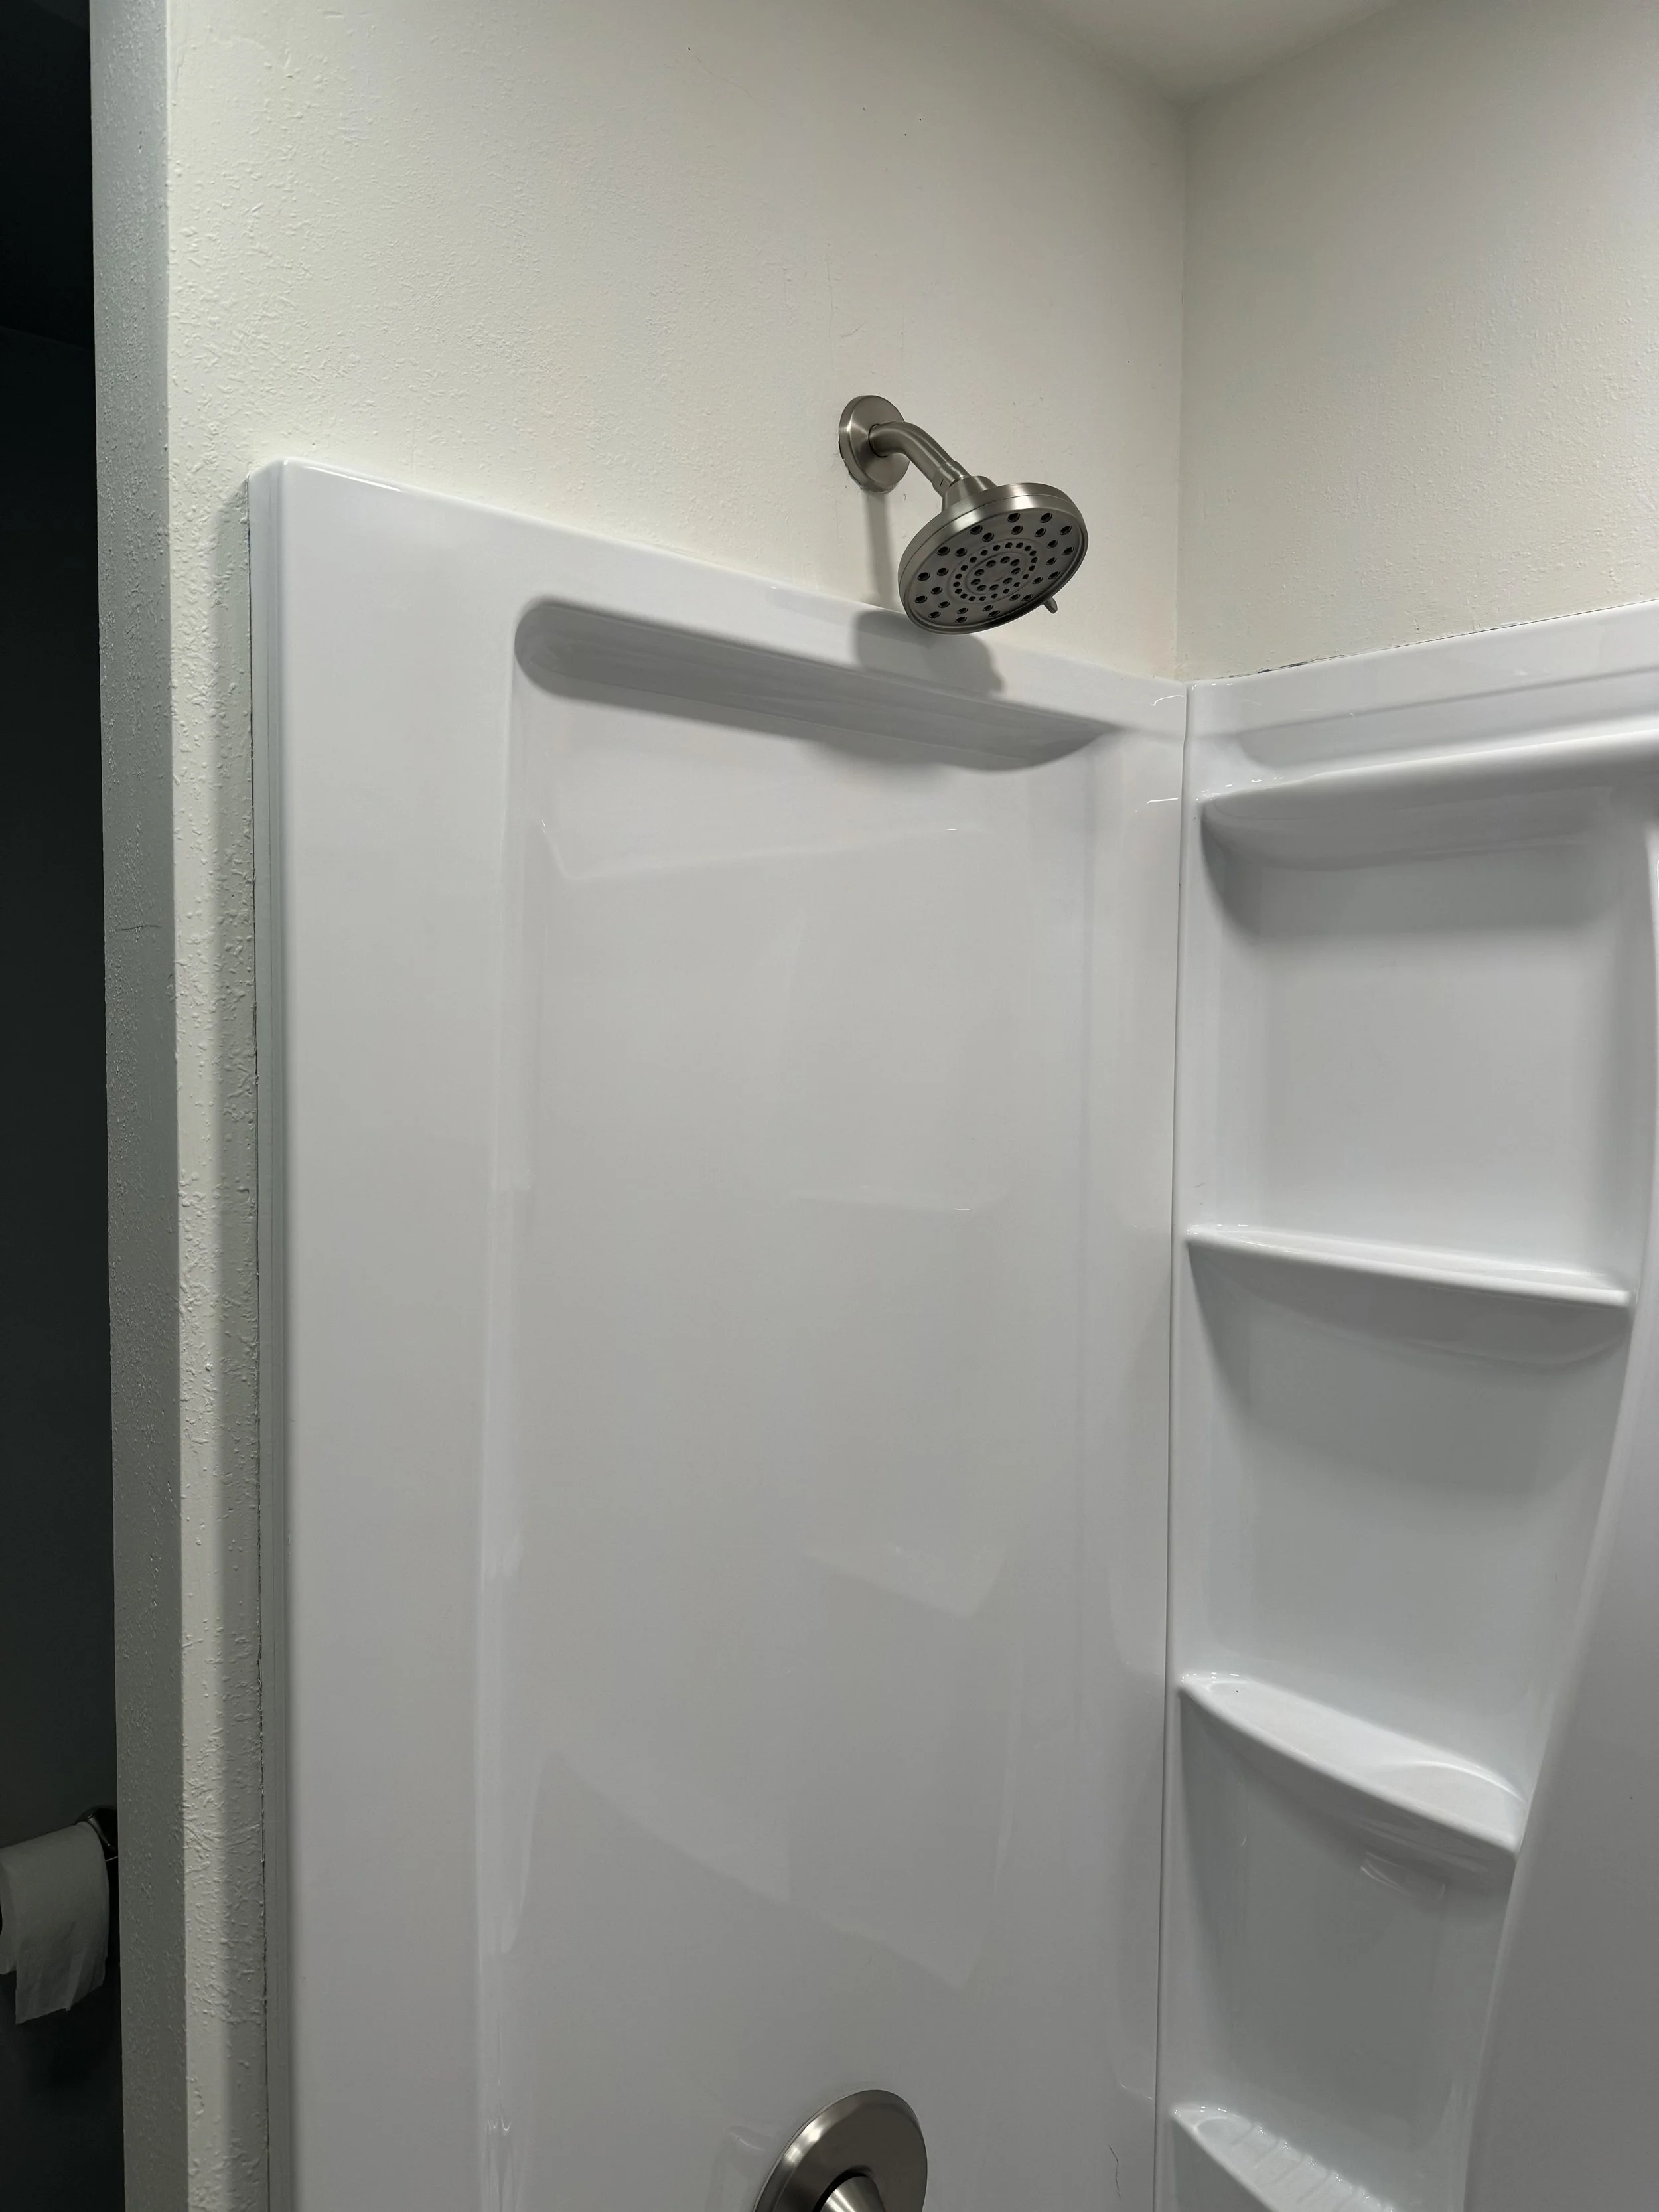
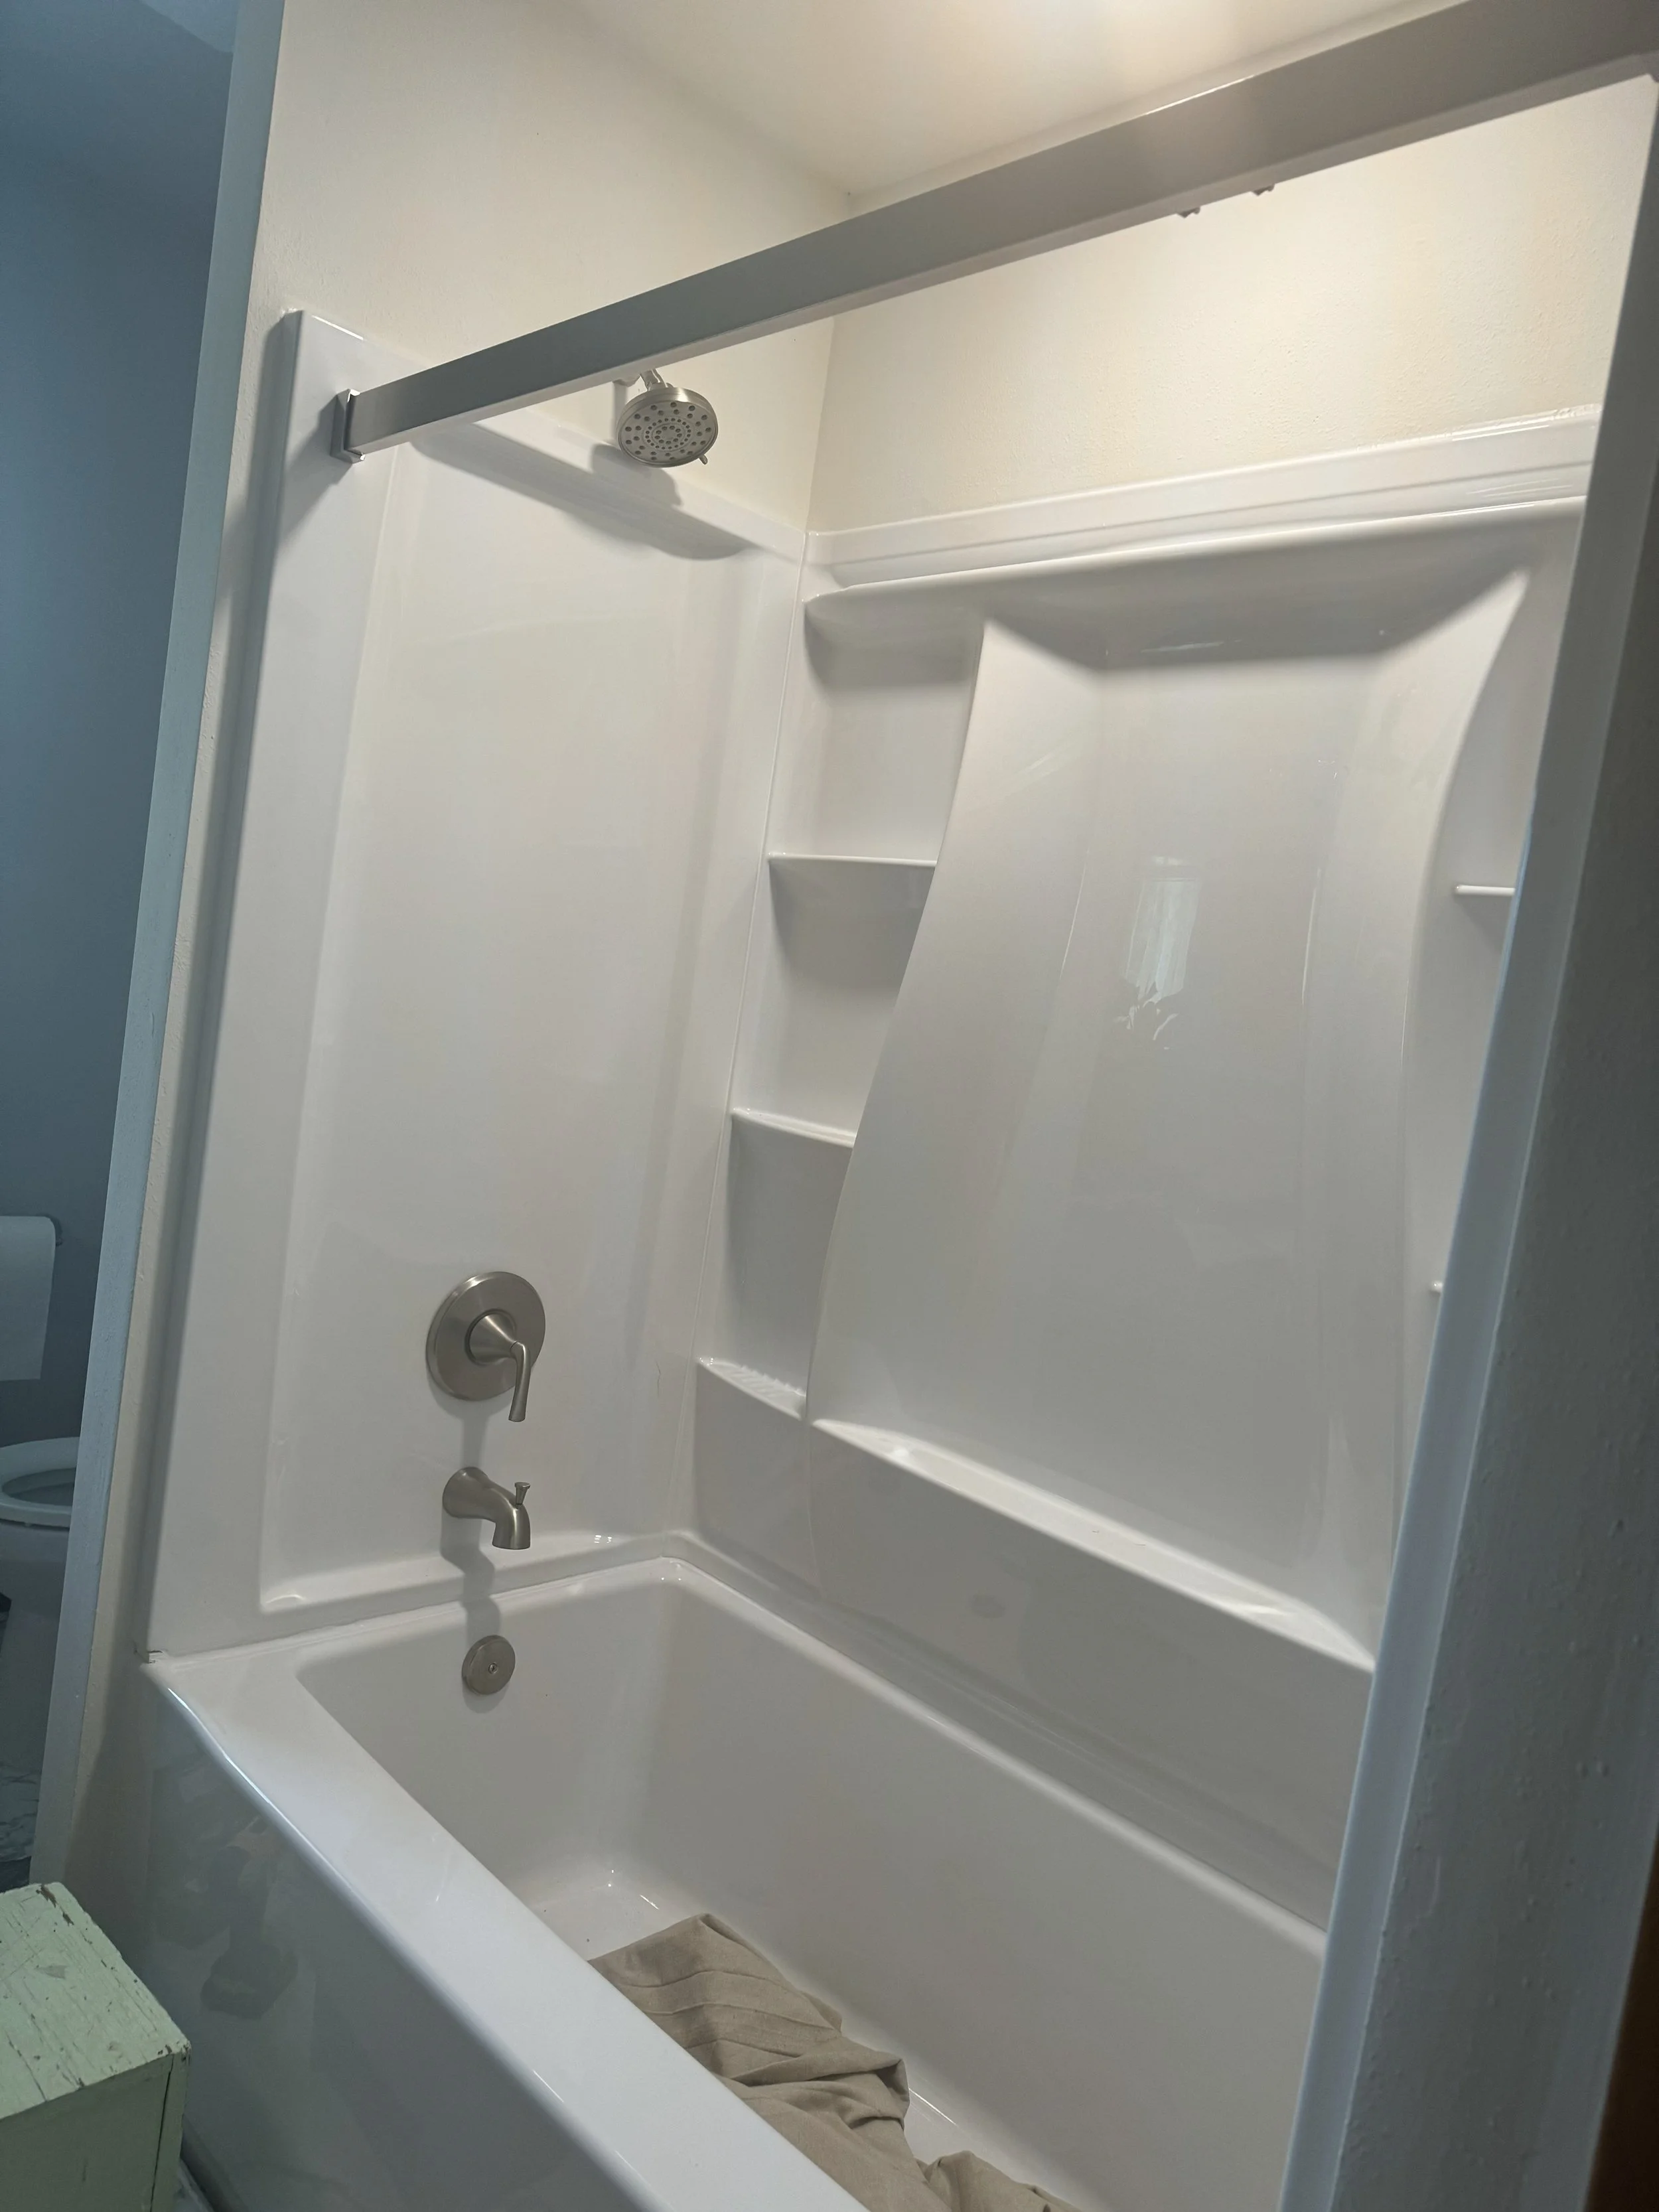
SHOWER COMPLETE!
It was a bit tricky hanging the shower doors in place by myself, but I managed by considering where I could rest the door if needed, and aligning all the hardware beforehand for a smooth connection. Once secured, the magnetic close strips were place including a water drip edge along the edge of the tub. Once caulked, the new shower/tub combo was complete.